Once your sourdough starter is active and ready, the real fun begins. I have been baking sourdough at home for a while now, and every single loaf teaches me something new. I am a trained chef with over ten years of professional kitchen experience, but I will be honest: sourdough still humbles me. The good news is that with a clear schedule and an understanding of what each step is actually doing, the process becomes far less intimidating.
This guide walks you through everything: my full day-by-day baking schedule, the techniques behind each stage, and the recipe I actually use. My goal is for you to come away not just with a recipe to follow, but with enough understanding to adapt it to your own kitchen and flour.
Tools I use for my sourdough making
You know what? I don't have any fancy equipment; no bannetons, no silicone baking mat for the Dutch oven (I really want this, though), no bread lame. All I have is a 24cm Staub La Cocotte with a chipped bottom, which I bought during the Covid years to make soups and stews. Since then, I have been using it as a Dutch oven for baking sourdough, too, but don't worry, you can absolutely bake without one.
Here's what I use:
- A large glass bowl
- A dinner plate to cover the bowl
- Whisk
- Spatula
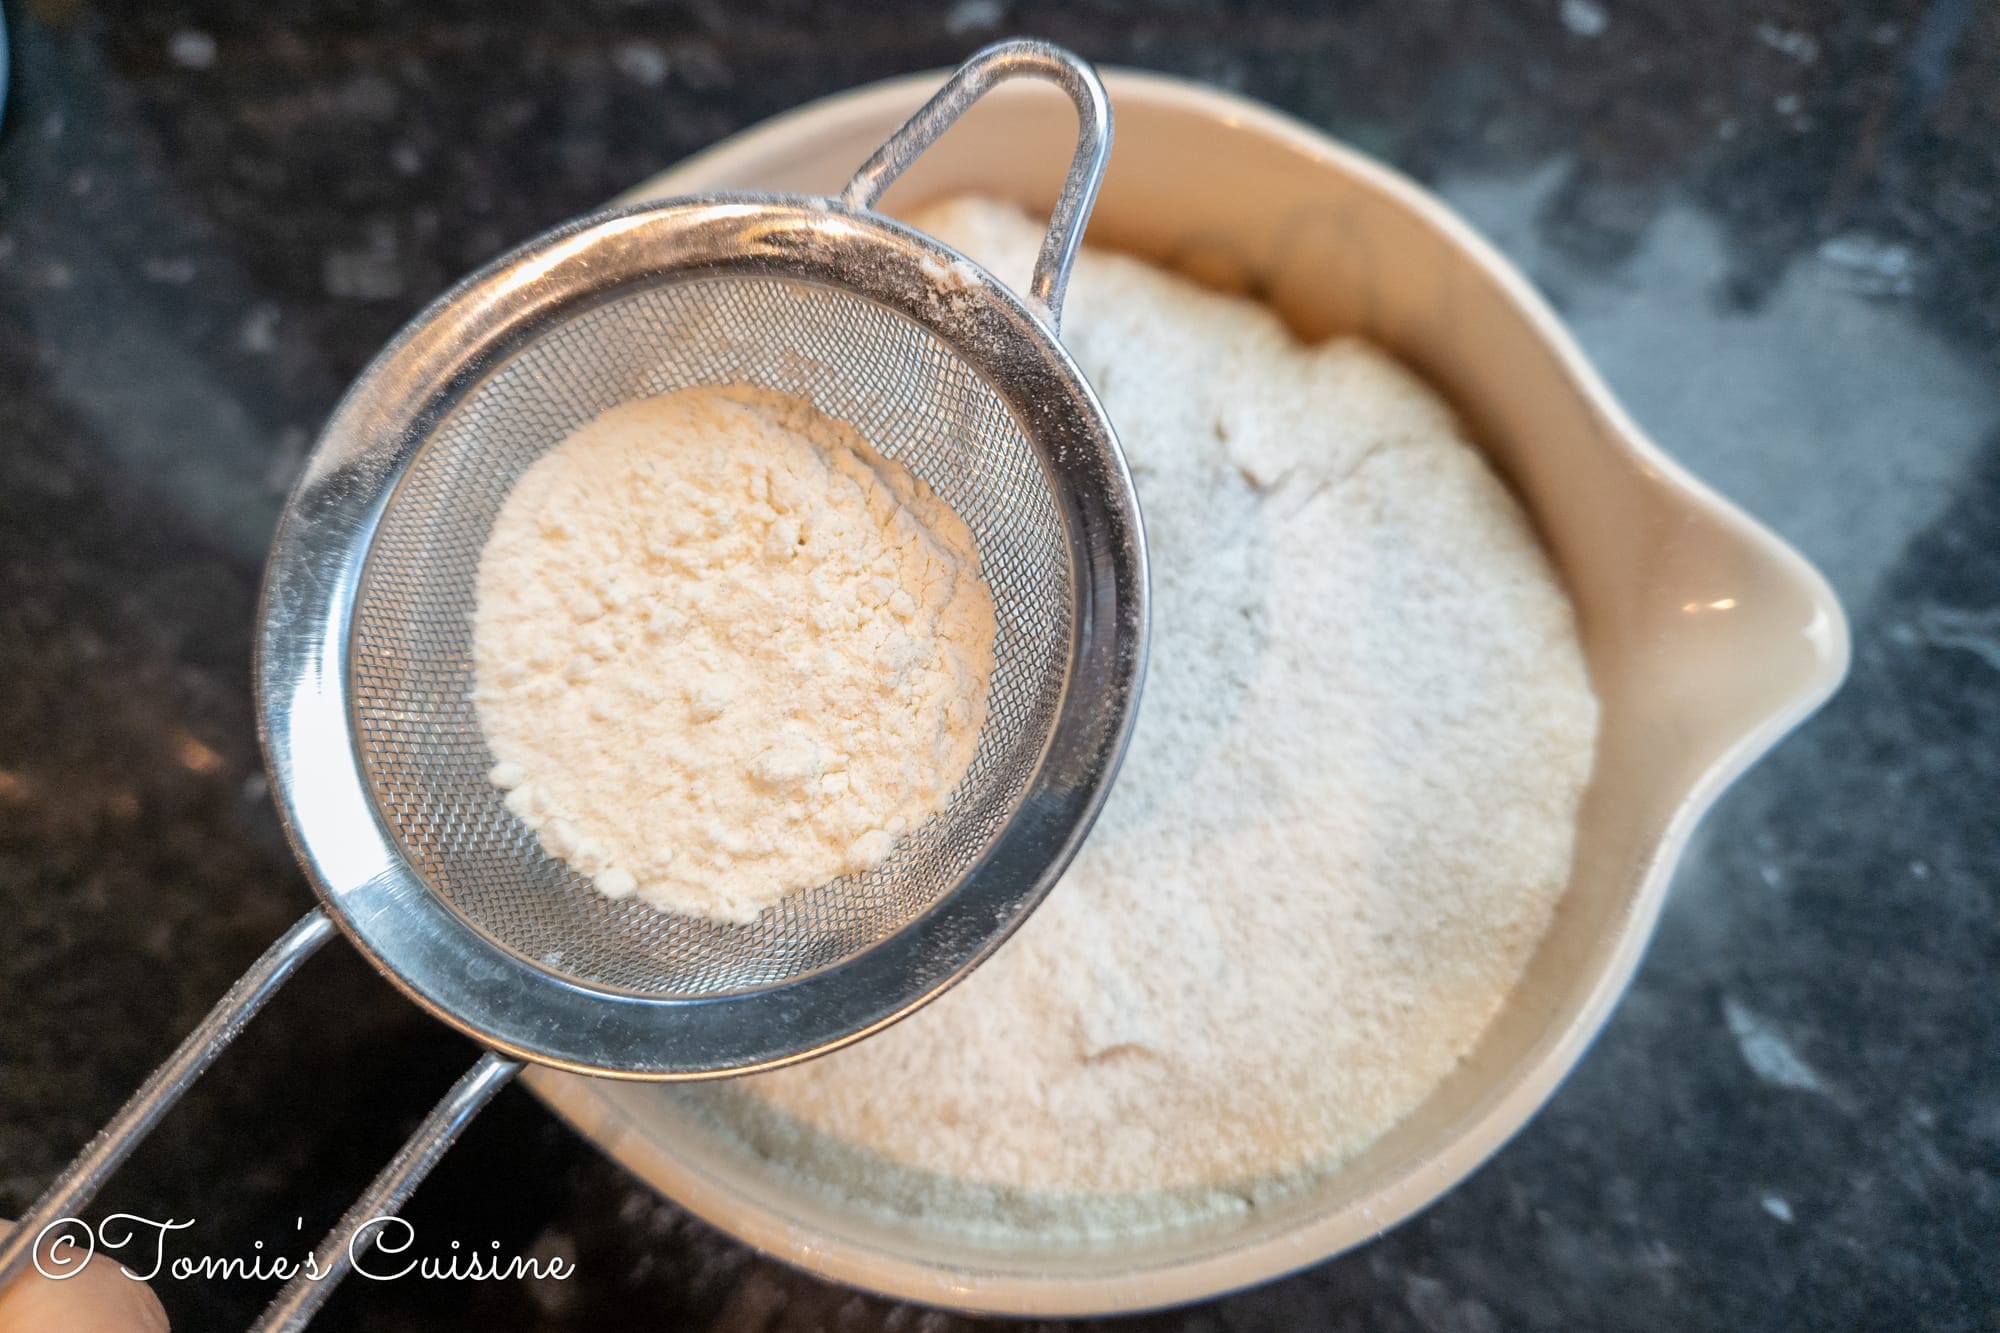
- A tea strainer to dust the flour
- Pastry card
- Tea towel
- Colander or bowl as a banneton
- Dutch oven (Staub Cast Iron Cocotte 24cm)
- Laser blade or a sharp knife
- Baking sheet
My usual sourdough bread-making schedule
One of the things that confused me most when I started was not the recipe itself, but the timing. Sourdough is not a recipe you follow in one sitting; it unfolds over a day, or sometimes two. Here is the schedule I follow, which works well for my kitchen temperature of around 19-21°C in South England in the spring.
10 pm, feed the starter the night before my day off
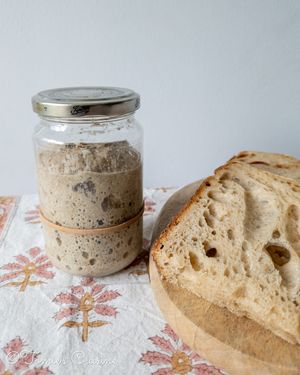
I usually take the sourdough starter out of the fridge around 10 pm, before bed, and feed it at a 1:5:5 ratio.
Example: 1 (10g starter): 5 (50g water): 5 (50g rye flour or bread flour)
That way, I can start preparing the dough between 8 and 9 am the following morning.
8–9 am, the next morning, the sourdough starter is ready to use
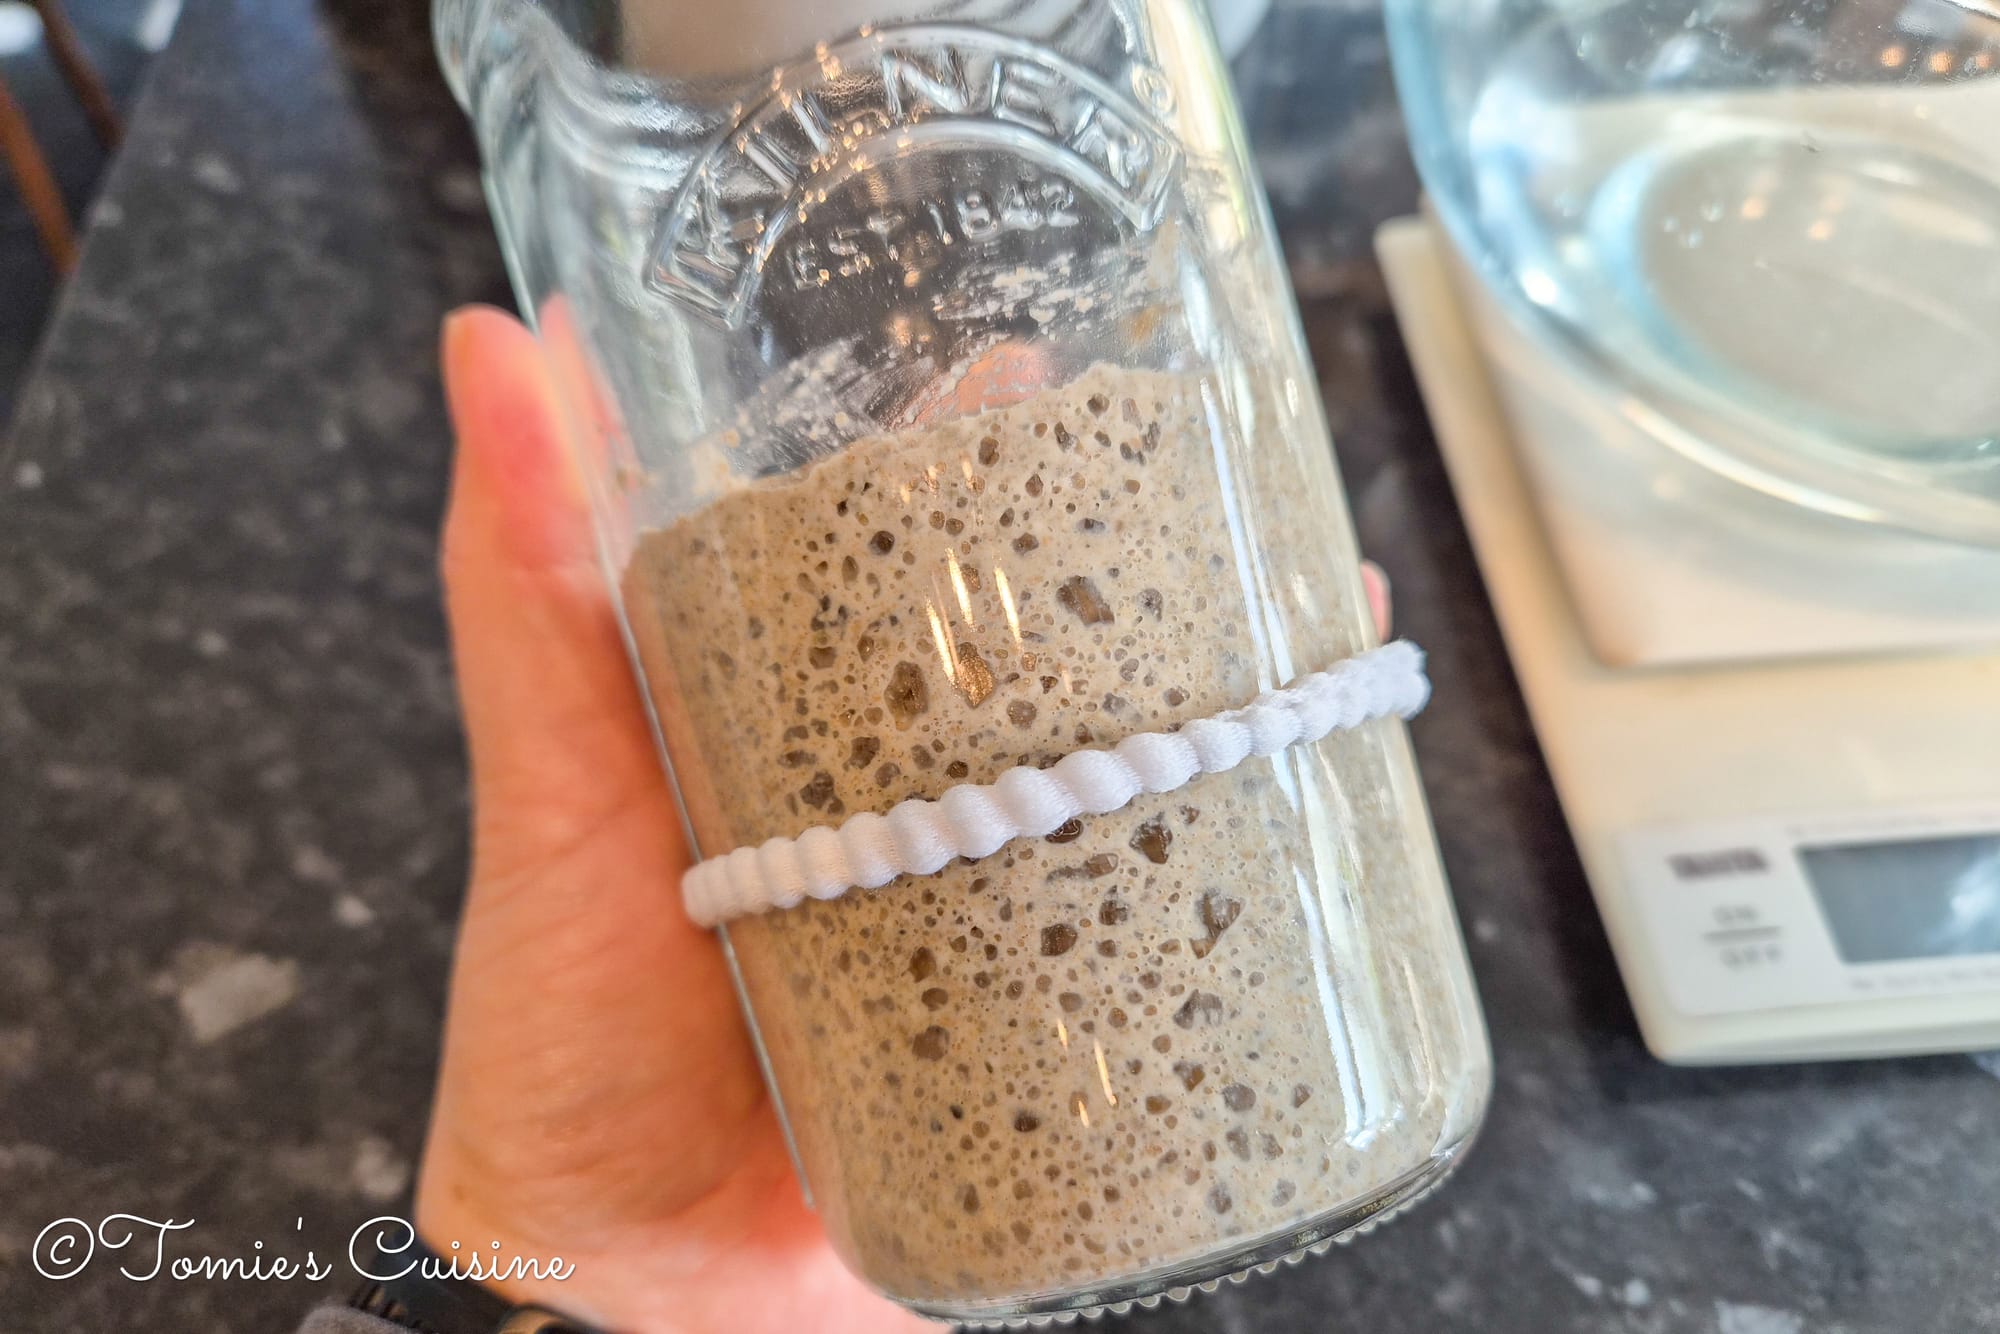
When my starter has reached its peak, it's very active and ready to go! I begin the bread-making process as soon as it gets there.
Around 12 pm, finishing the folds and leaving it for bulk fermentation
When I start around 9 am, I usually finish all the steps before bulk fermentation by midday.
5–6 pm, shaping the dough and moving on to cold fermentation
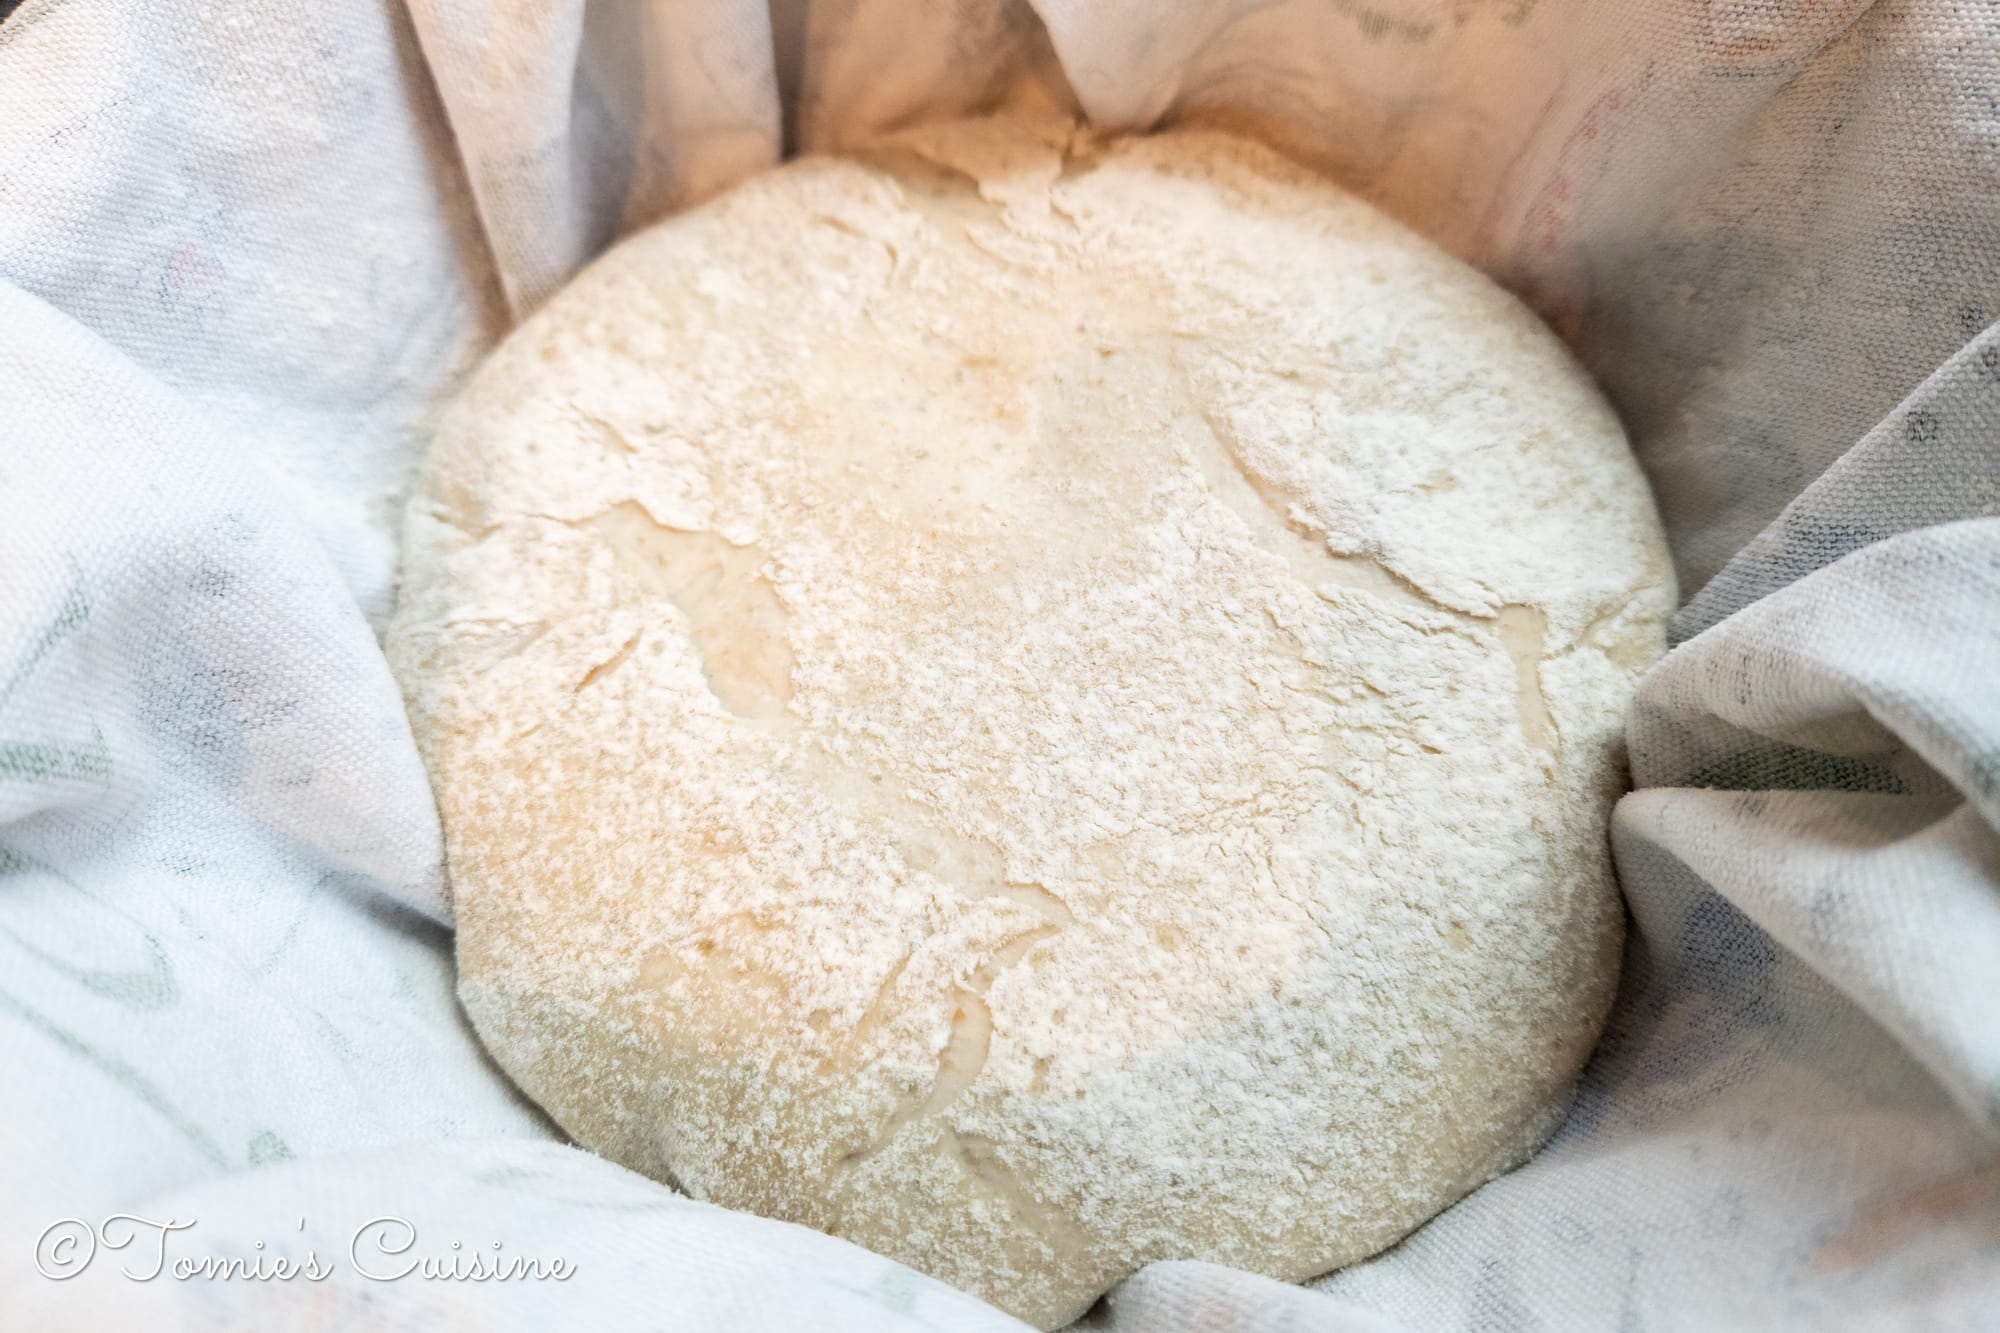
Depending on the temperature and the dough itself, bulk fermentation is usually done by 5 to 6 pm, or even earlier if the kitchen is warm. Once it's ready for shaping, I do the first shape, then rest the dough for about 15 to 20 minutes. While it rests, I prepare the banneton. Well, I don't actually have one, so I line a bowl with a tea towel and dust the surface with flour. Then I do the second shaping, place the dough in the prepared bowl, cover it, and pop it into the fridge for the final fermentation.
Next morning, bake the bread for breakfast or lunch
After a slow fermentation in the fridge, I bake the dough in the morning. When my French side of the family came to visit, I got up at 6 am, preheated the oven, and had a fresh loaf ready in time for breakfast at 9 am. It was still slightly warm by then, which was perfect.
Enjoying the sourdough series?
Subscribe to Tomie’s Cuisine newsletter and get the next article as soon as it goes live, plus seasonal recipes, eco-friendly kitchen guides, travel, and more. No spam, ever.
The sourdough bread recipe
Ingredients
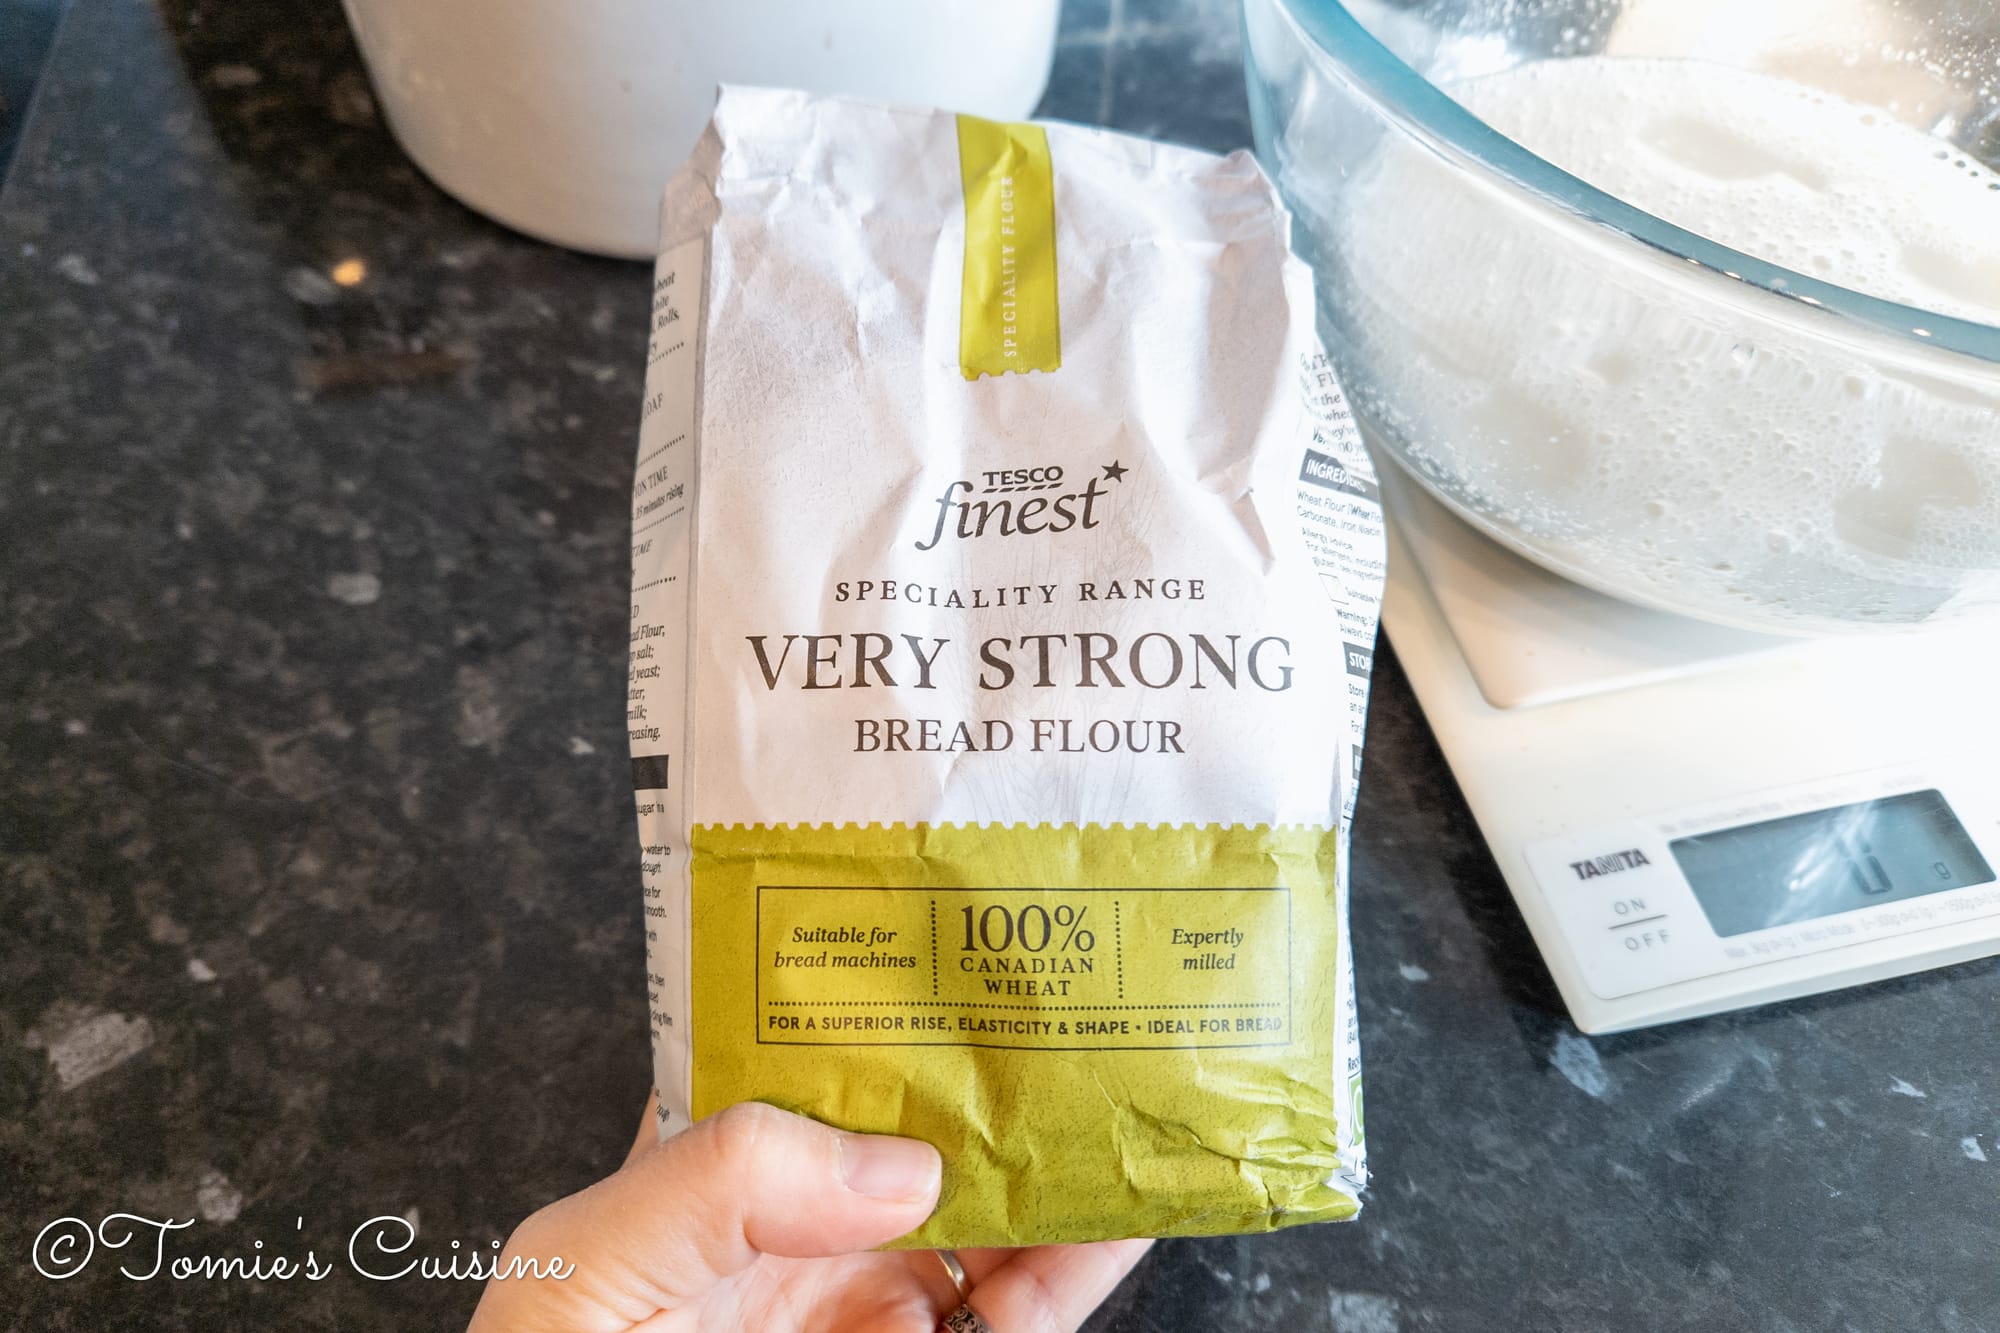
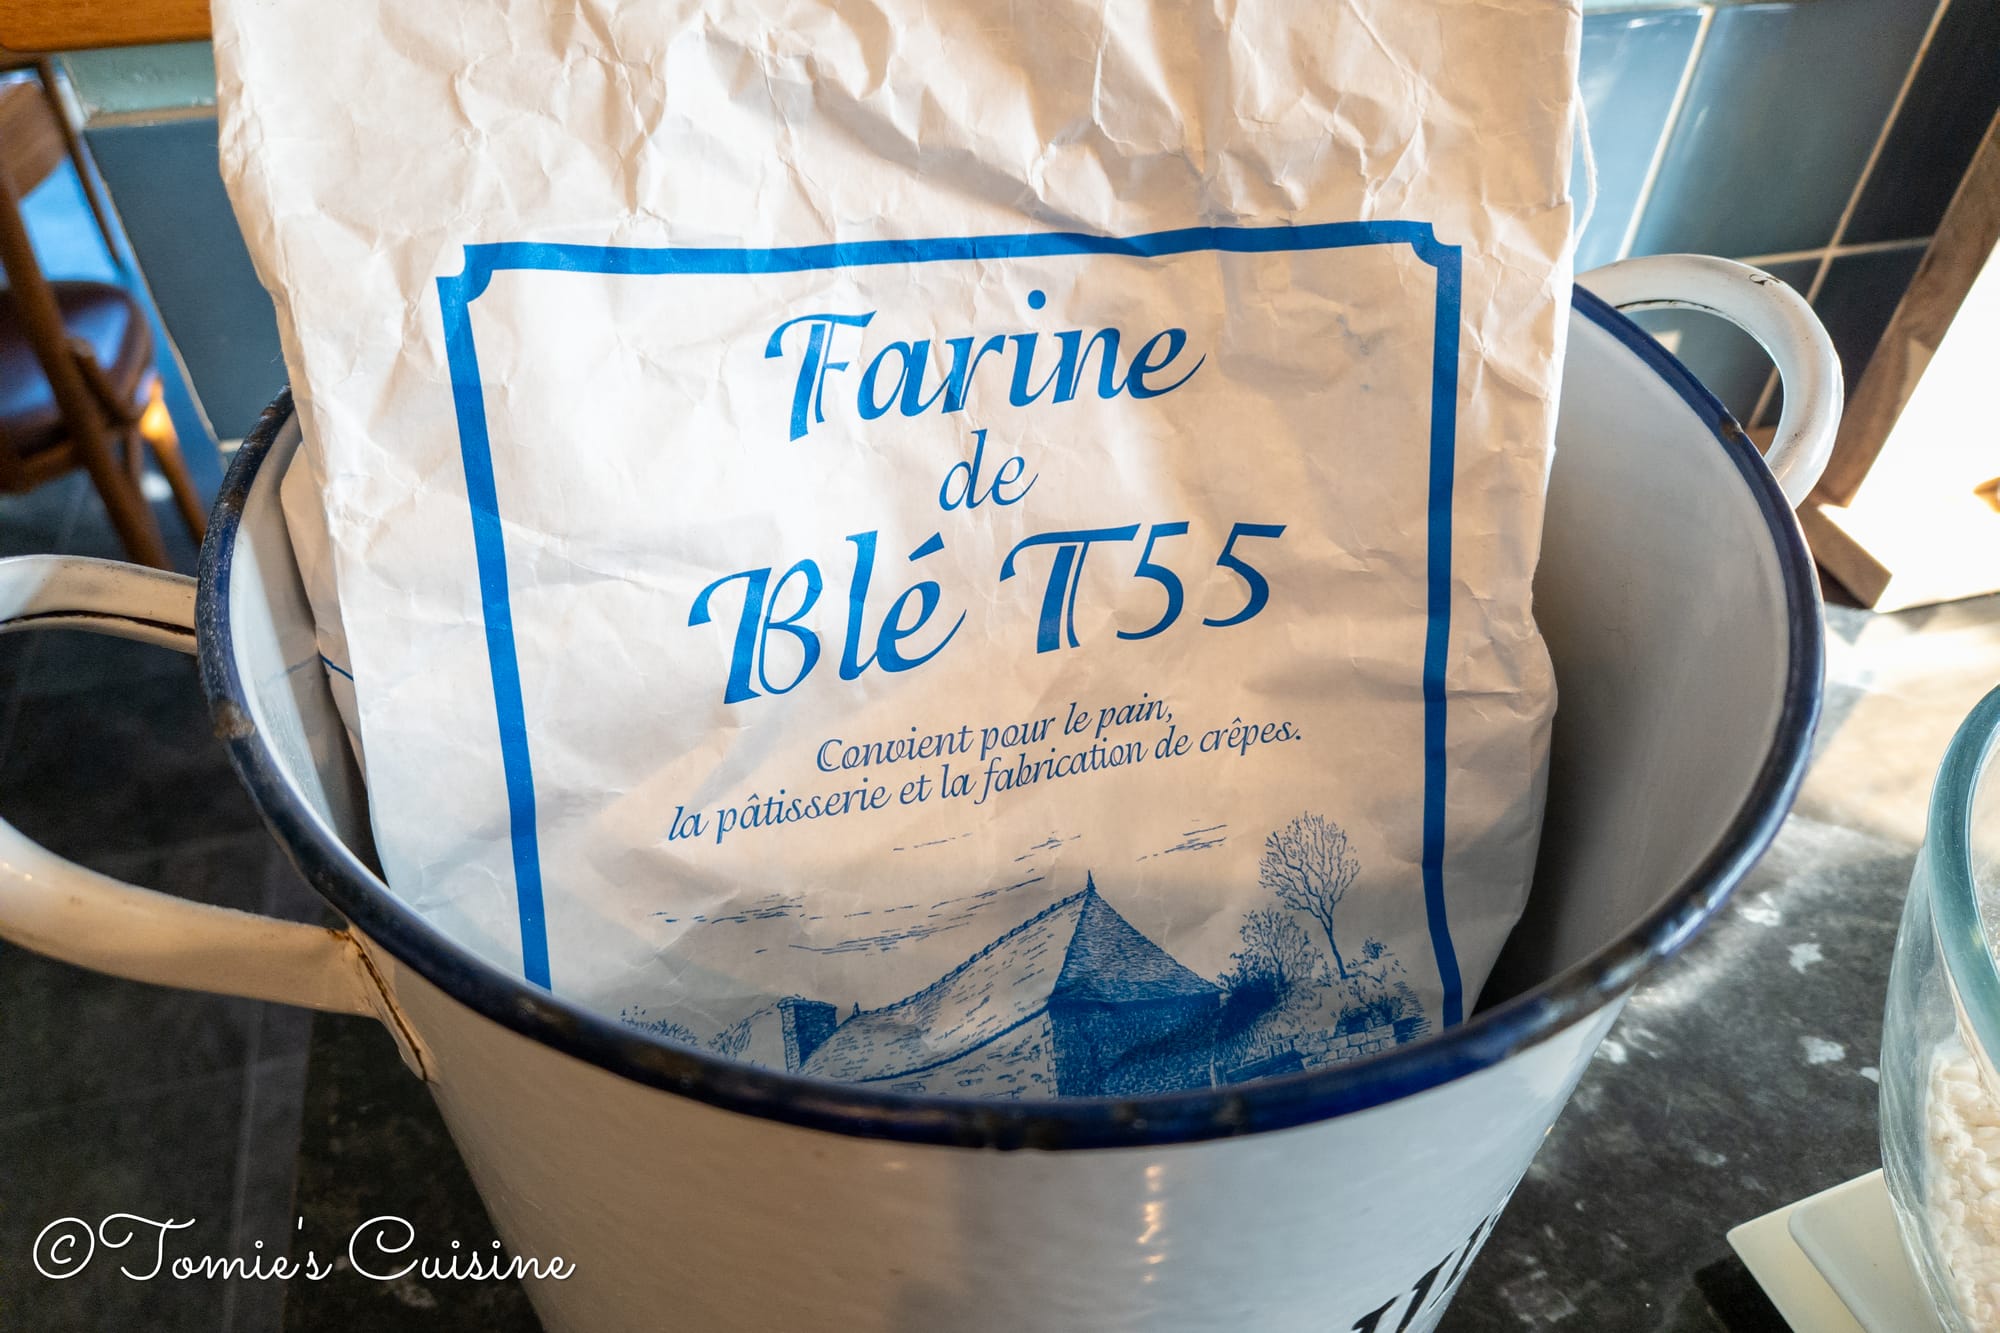

This time, we used a mixture of 250g of Very Strong Flour from Tesco, which has 14.3g of protein per 100g, and 250g of T55 flour, which we brought back from France in January and contains about 12g of protein per 100g.
- 500g bread flour
- 350g water
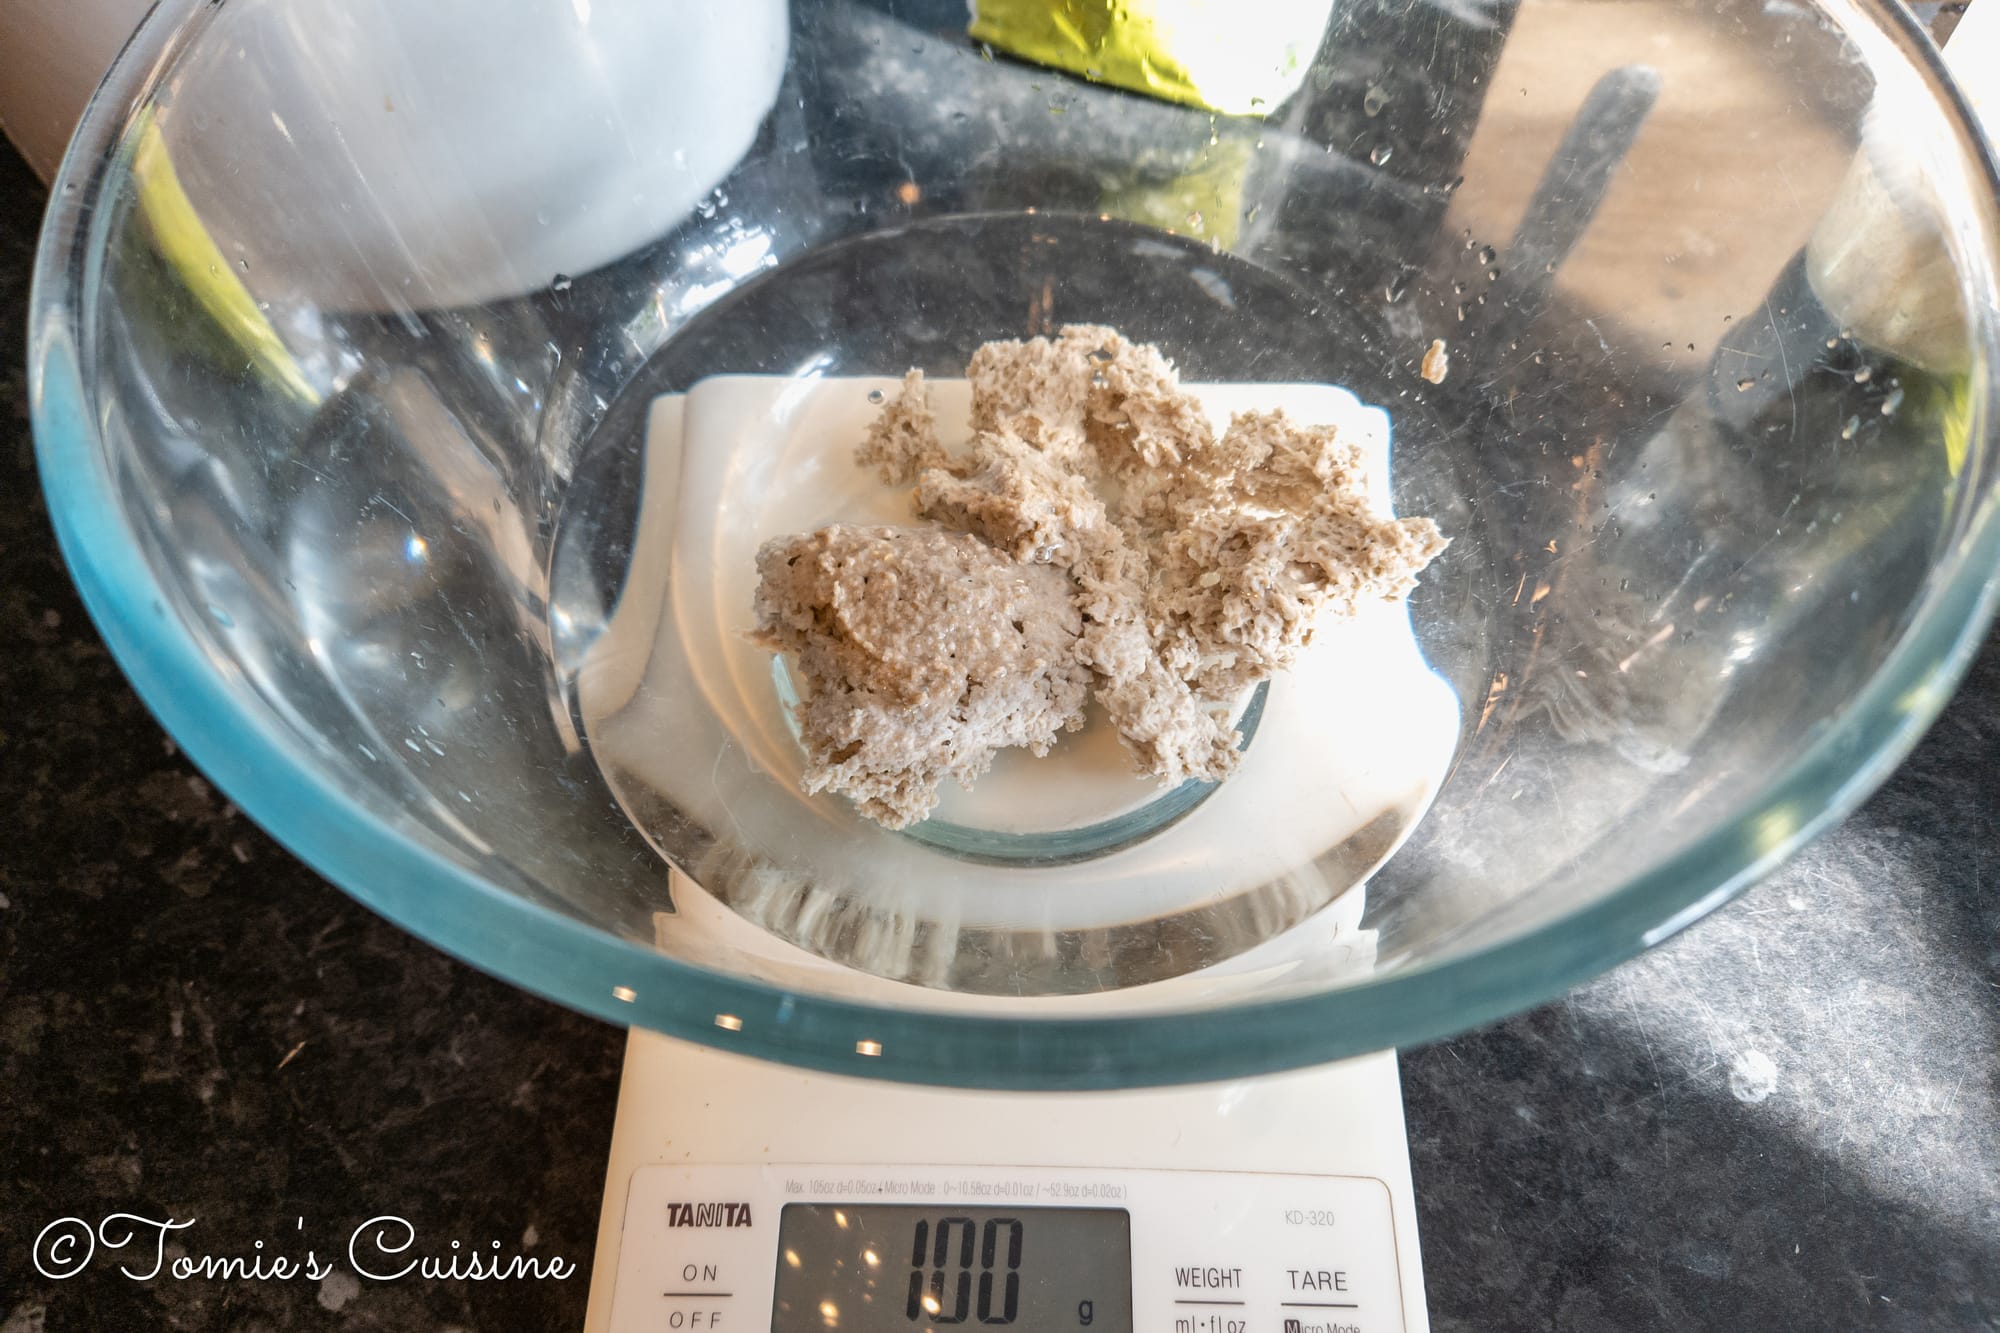
- 100g active starter
- 10g salt
A note on hydration
When I first started, I followed the ratios I kept seeing online, and the dough proved very difficult to handle. I gradually reduced the water, settling somewhere around 330g, then worked back up to 350g once I was more comfortable. Start lower if you are new to this, and increase gradually as you get a feel for how your flour behaves.
Instructions
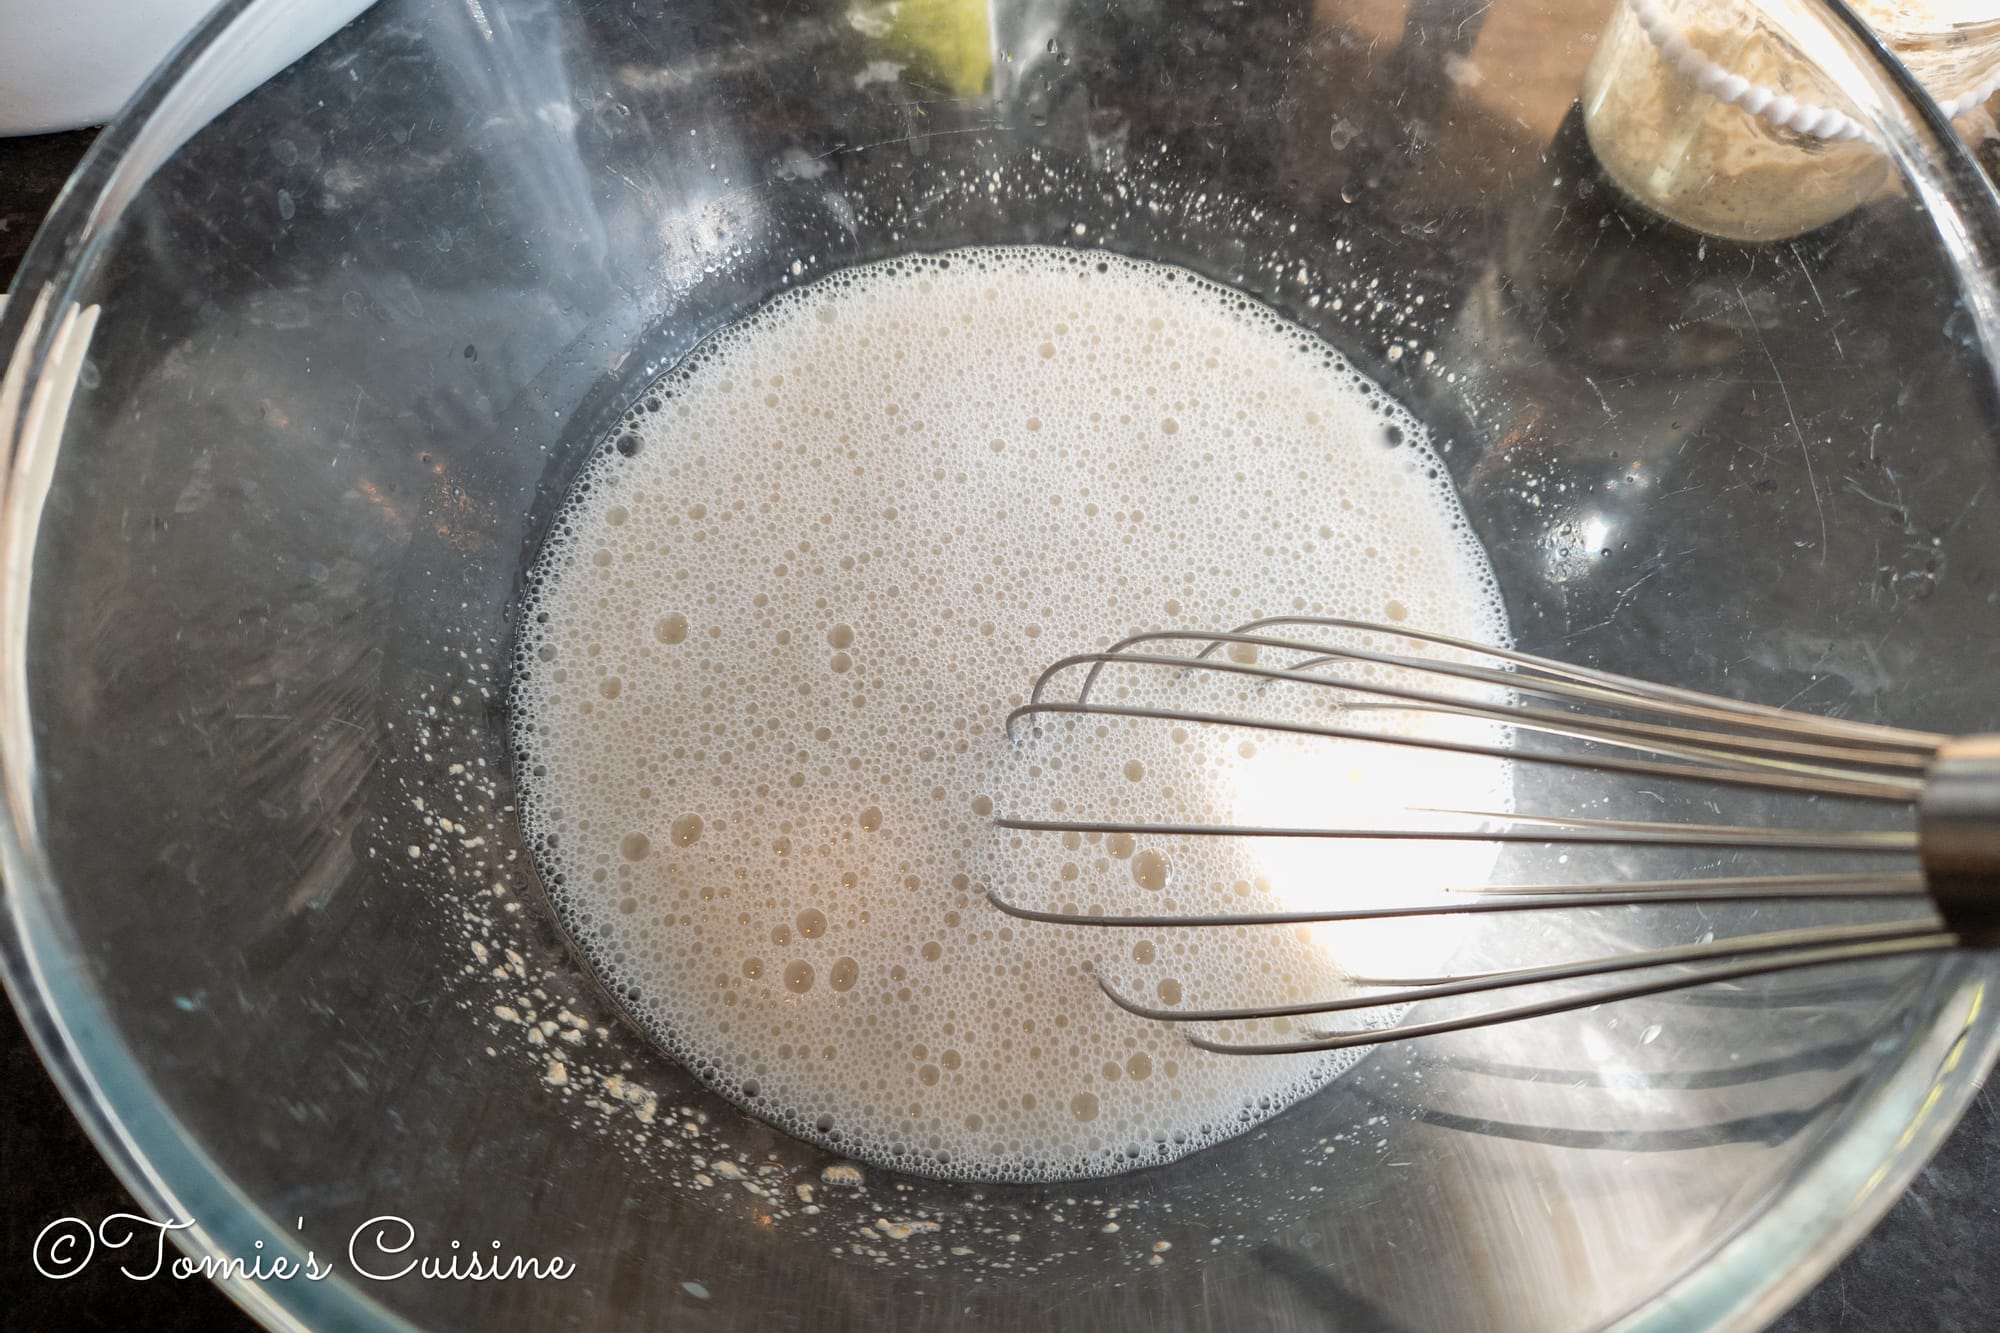
- Add the water and starter to a large bowl and mix well. I like to use a whisk here.
After using the sourdough starter, I keep the leftover in the jar in the fridge until next time.
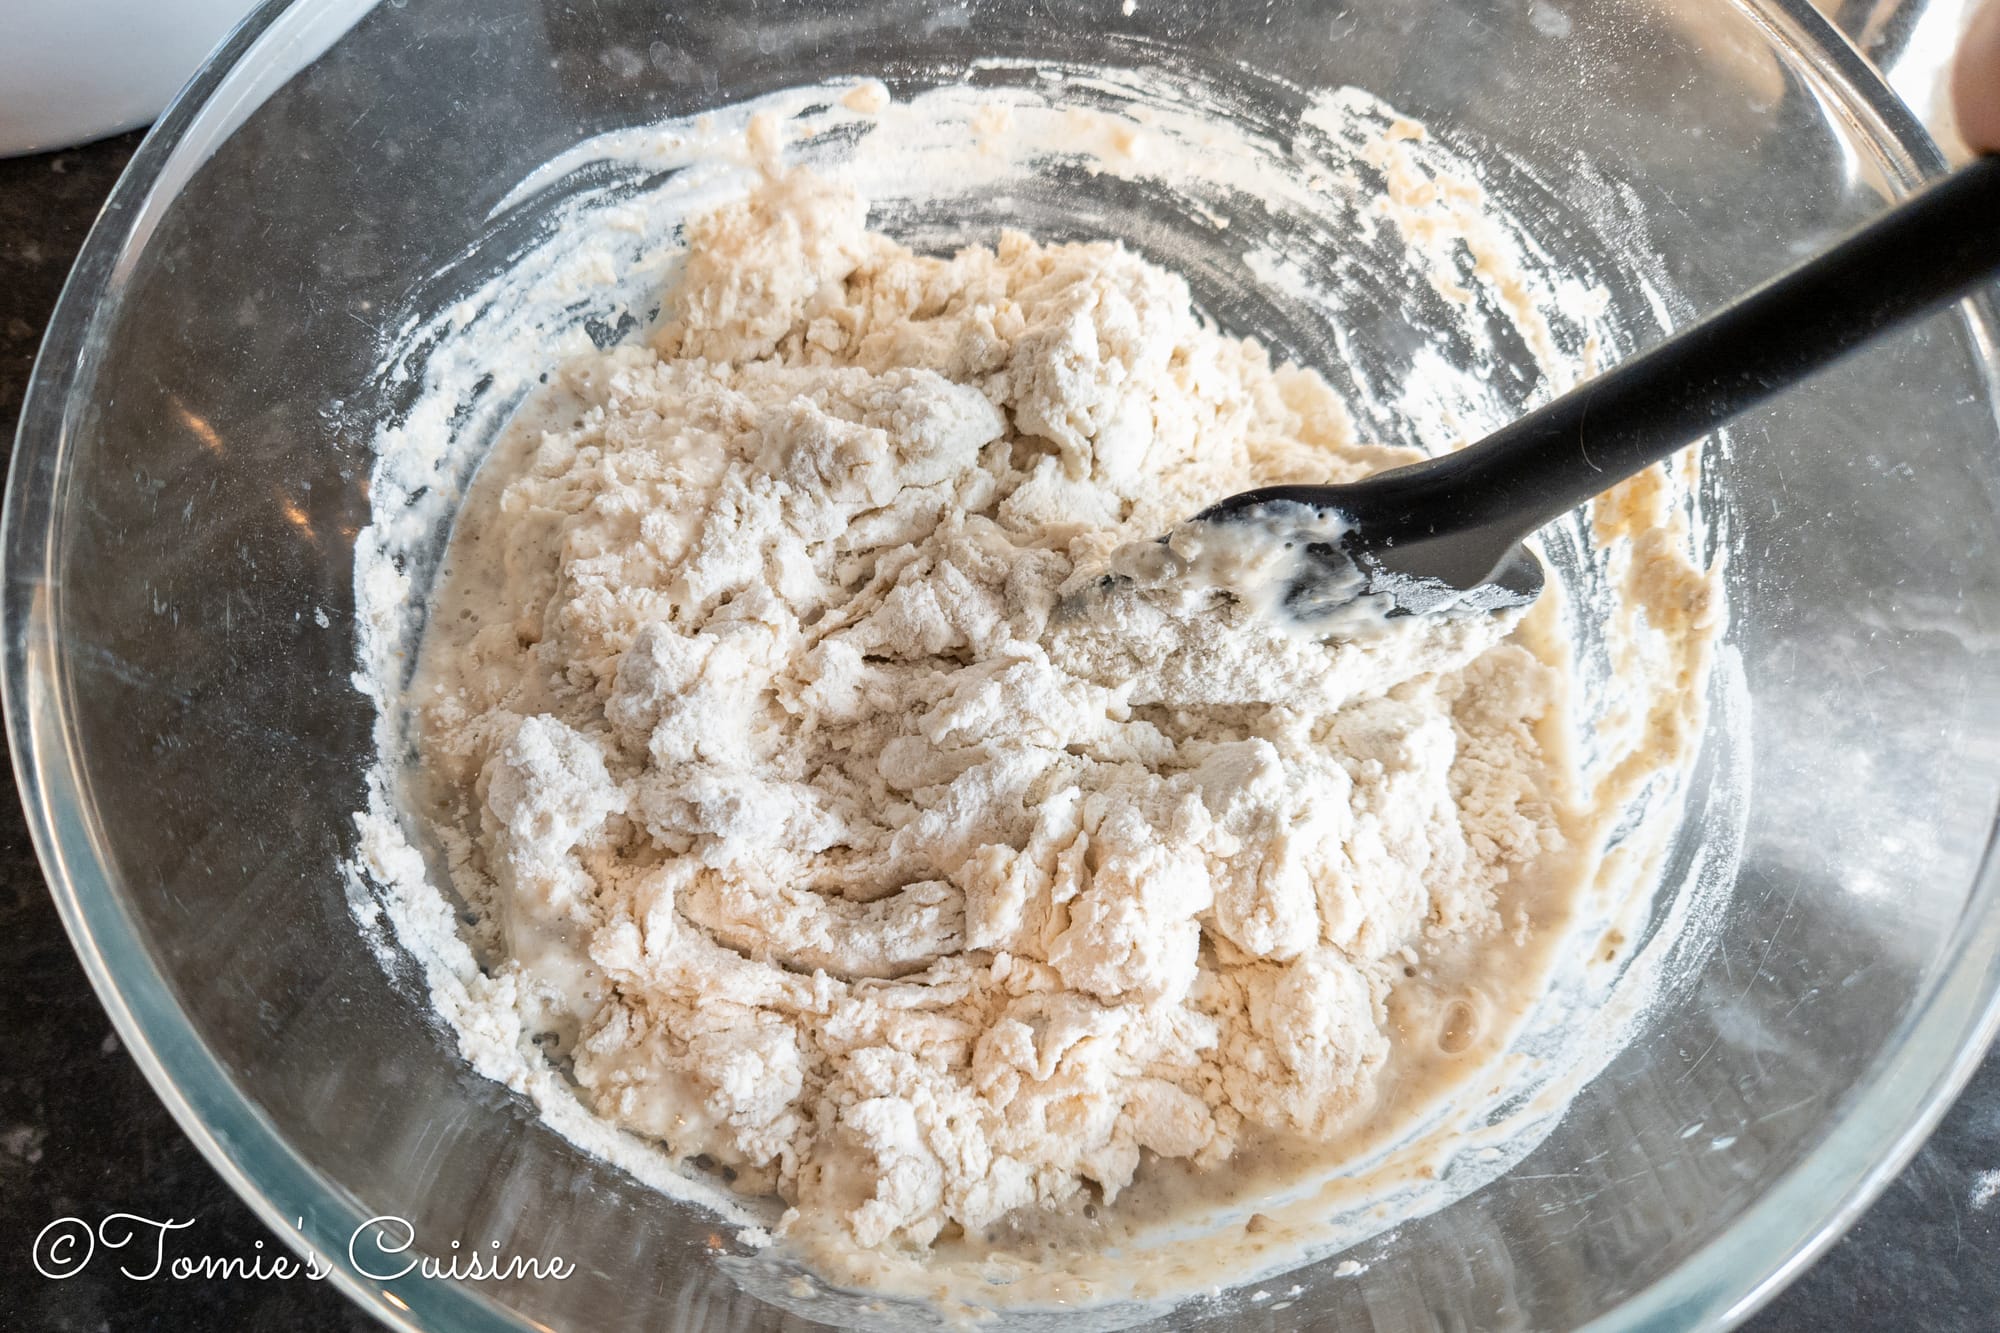
- Add the flour and salt, then combine with a silicone spatula. Mix until no dry bits of flour remain. If you are not sure, knead briefly by hand to check for any dry spots.
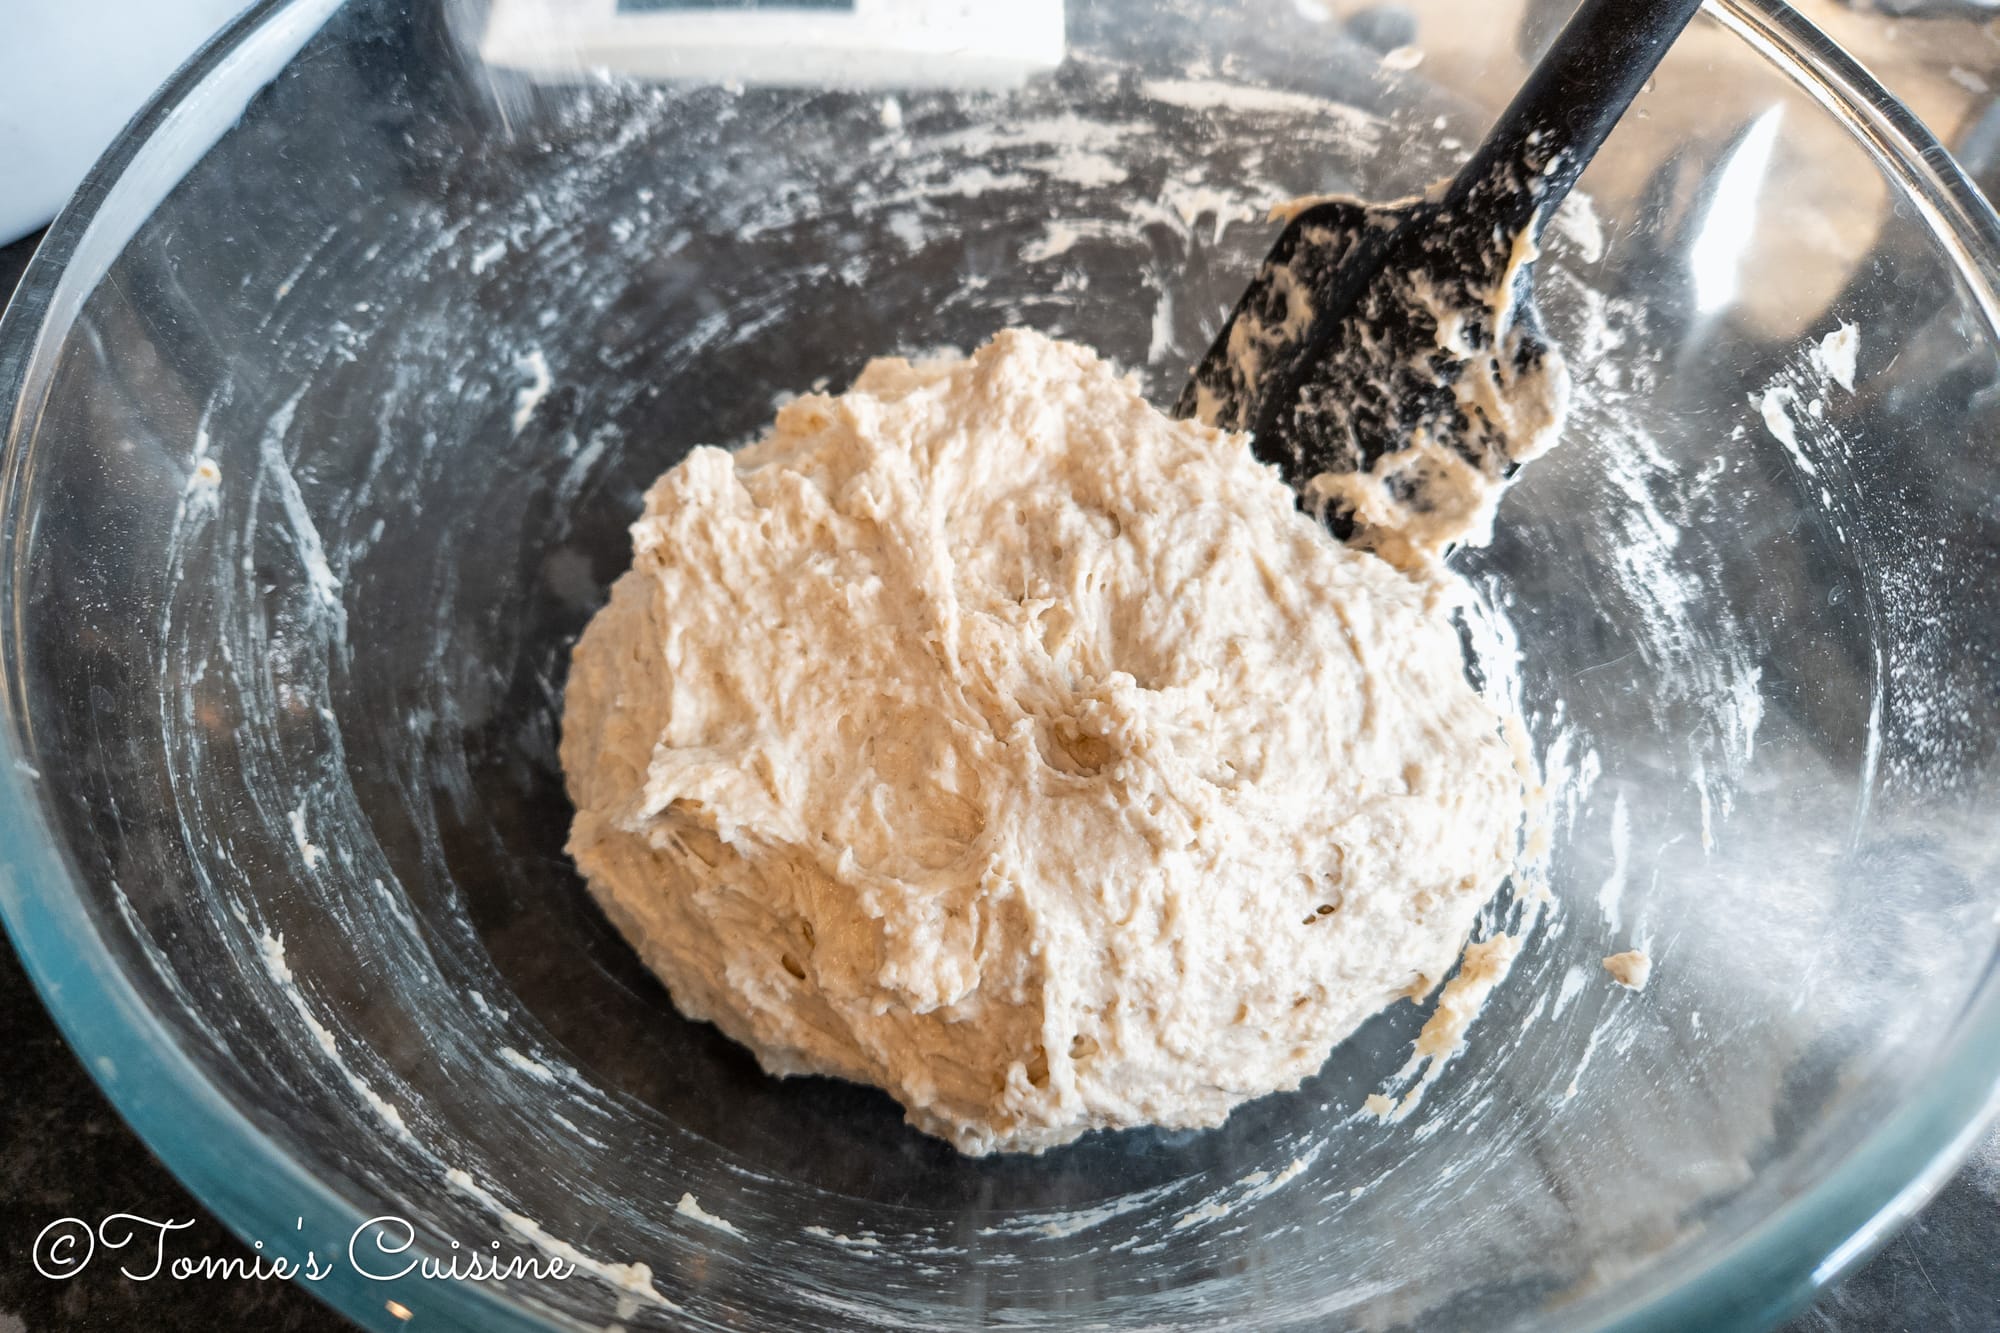
- Cover the bowl with a plate or tea towel and leave it to rest for about 15 minutes.
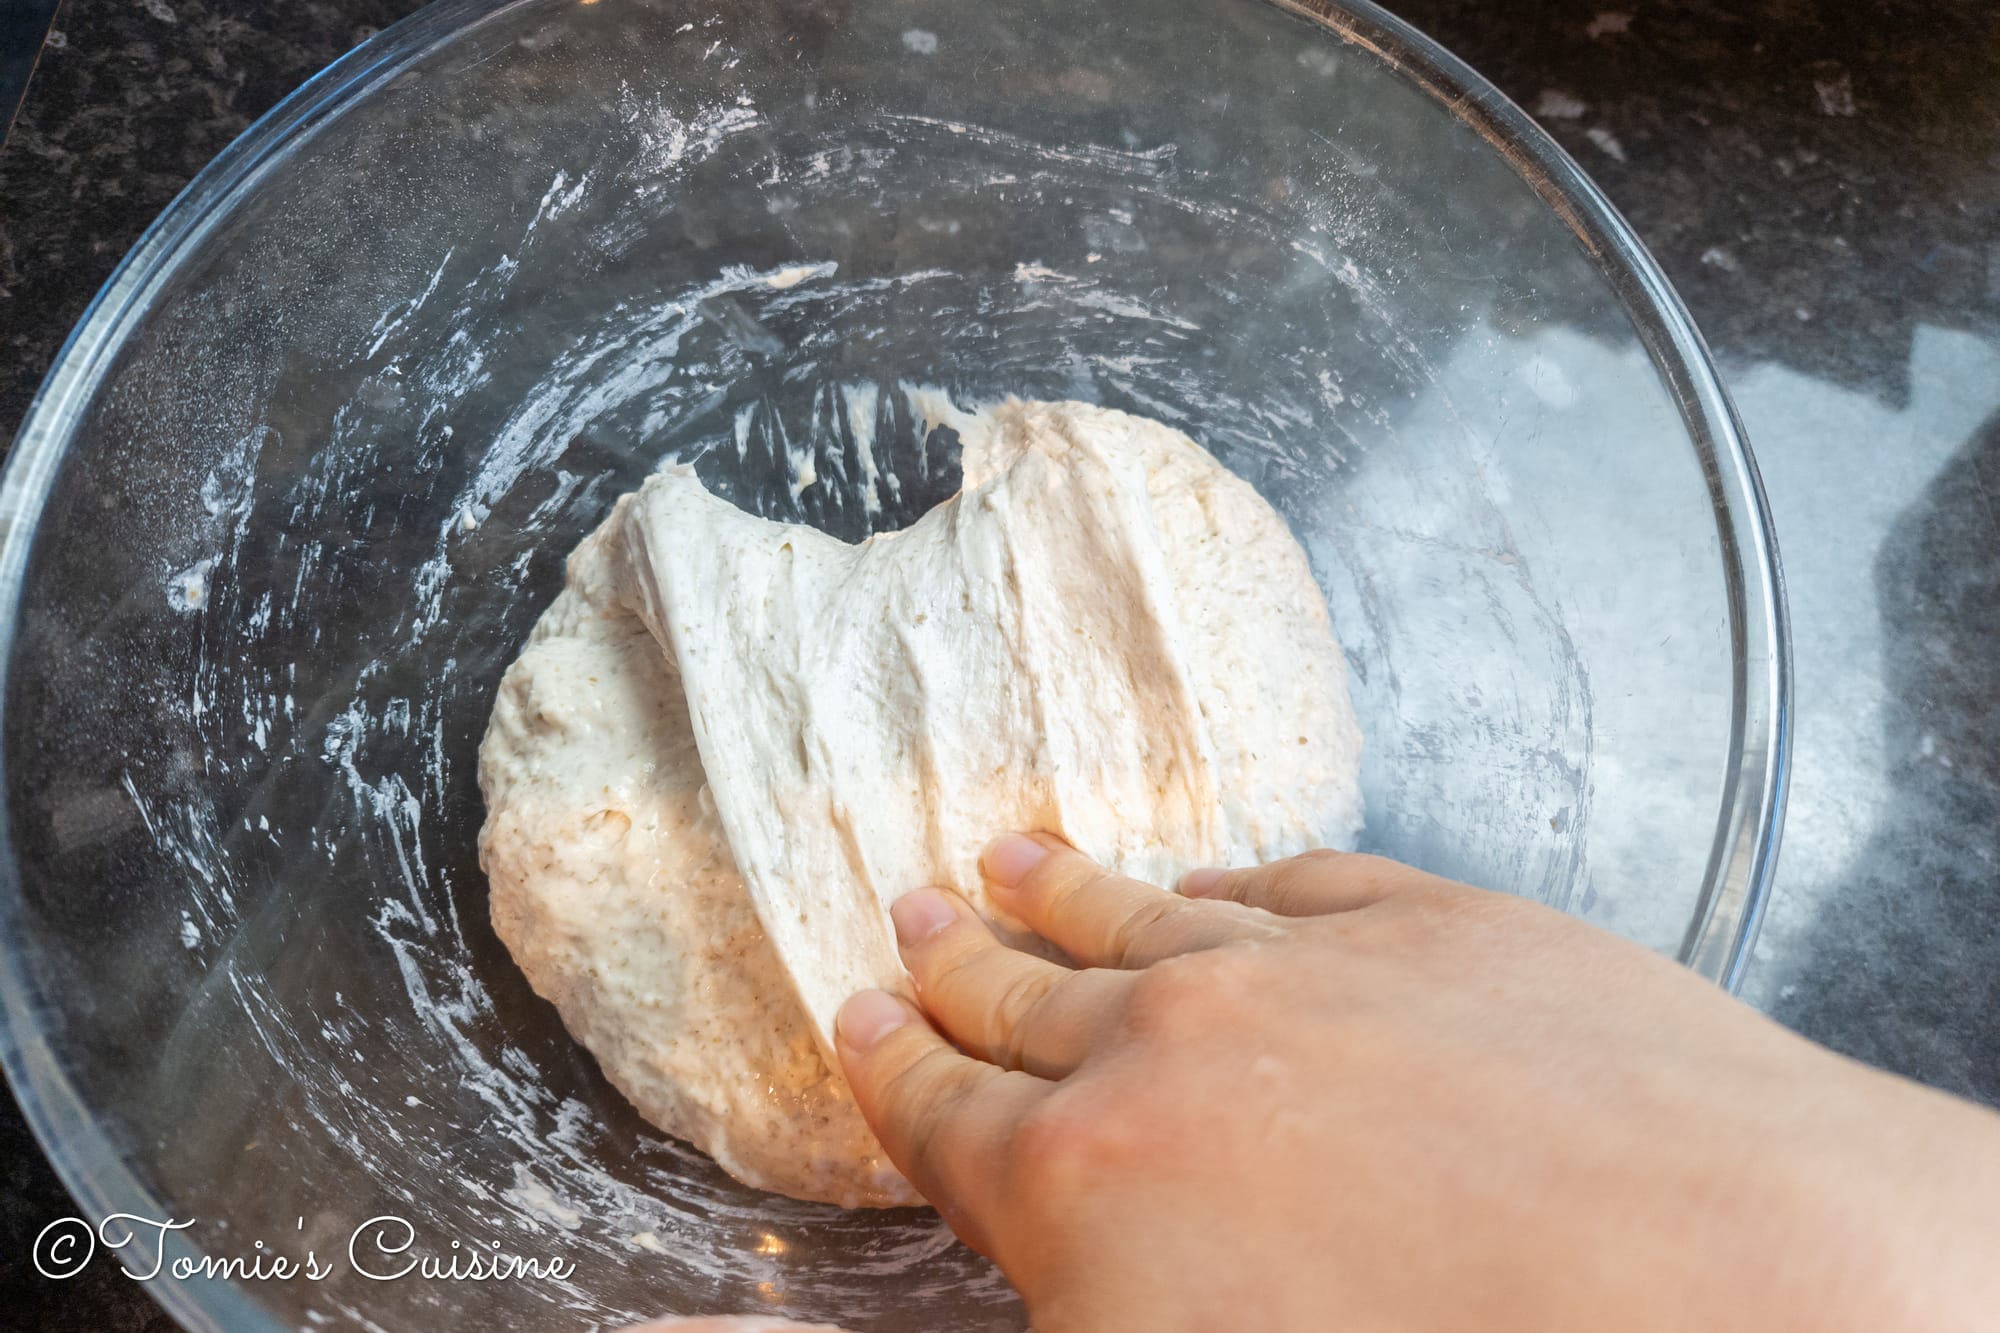
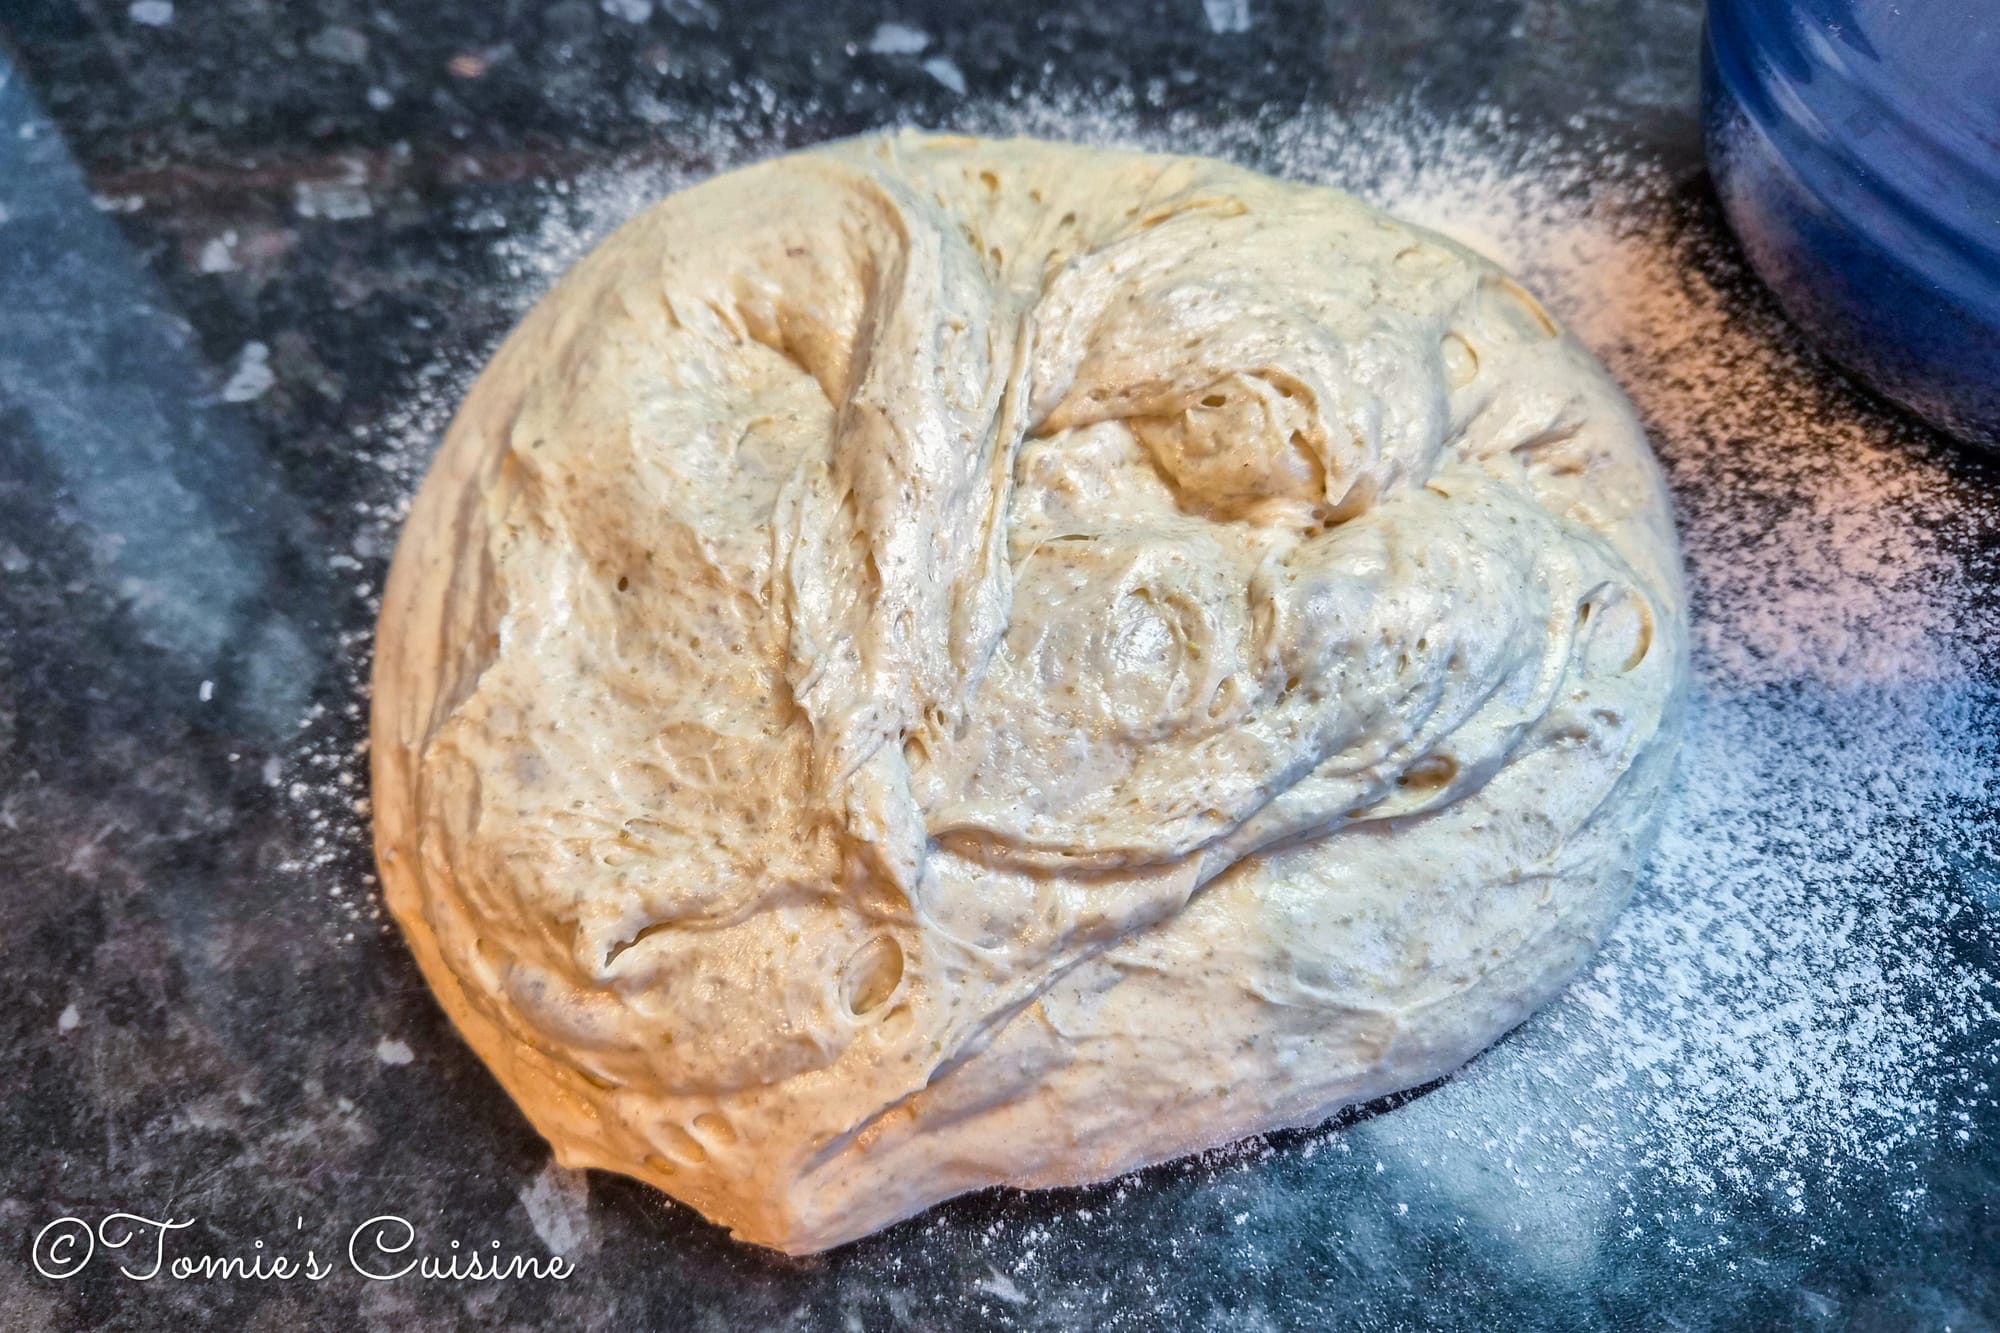
- Perform the first stretch-and-fold, then leave for about 30 minutes. Repeat this 4 to 5 times until the gluten is fully developed.
What are stretch and fold, and coil fold?
These are techniques sourdough bakers use to build strength in the dough. This is really important because if the dough isn't strong enough, it won't hold its shape and won't trap the gas produced during fermentation, so it will struggle to rise.
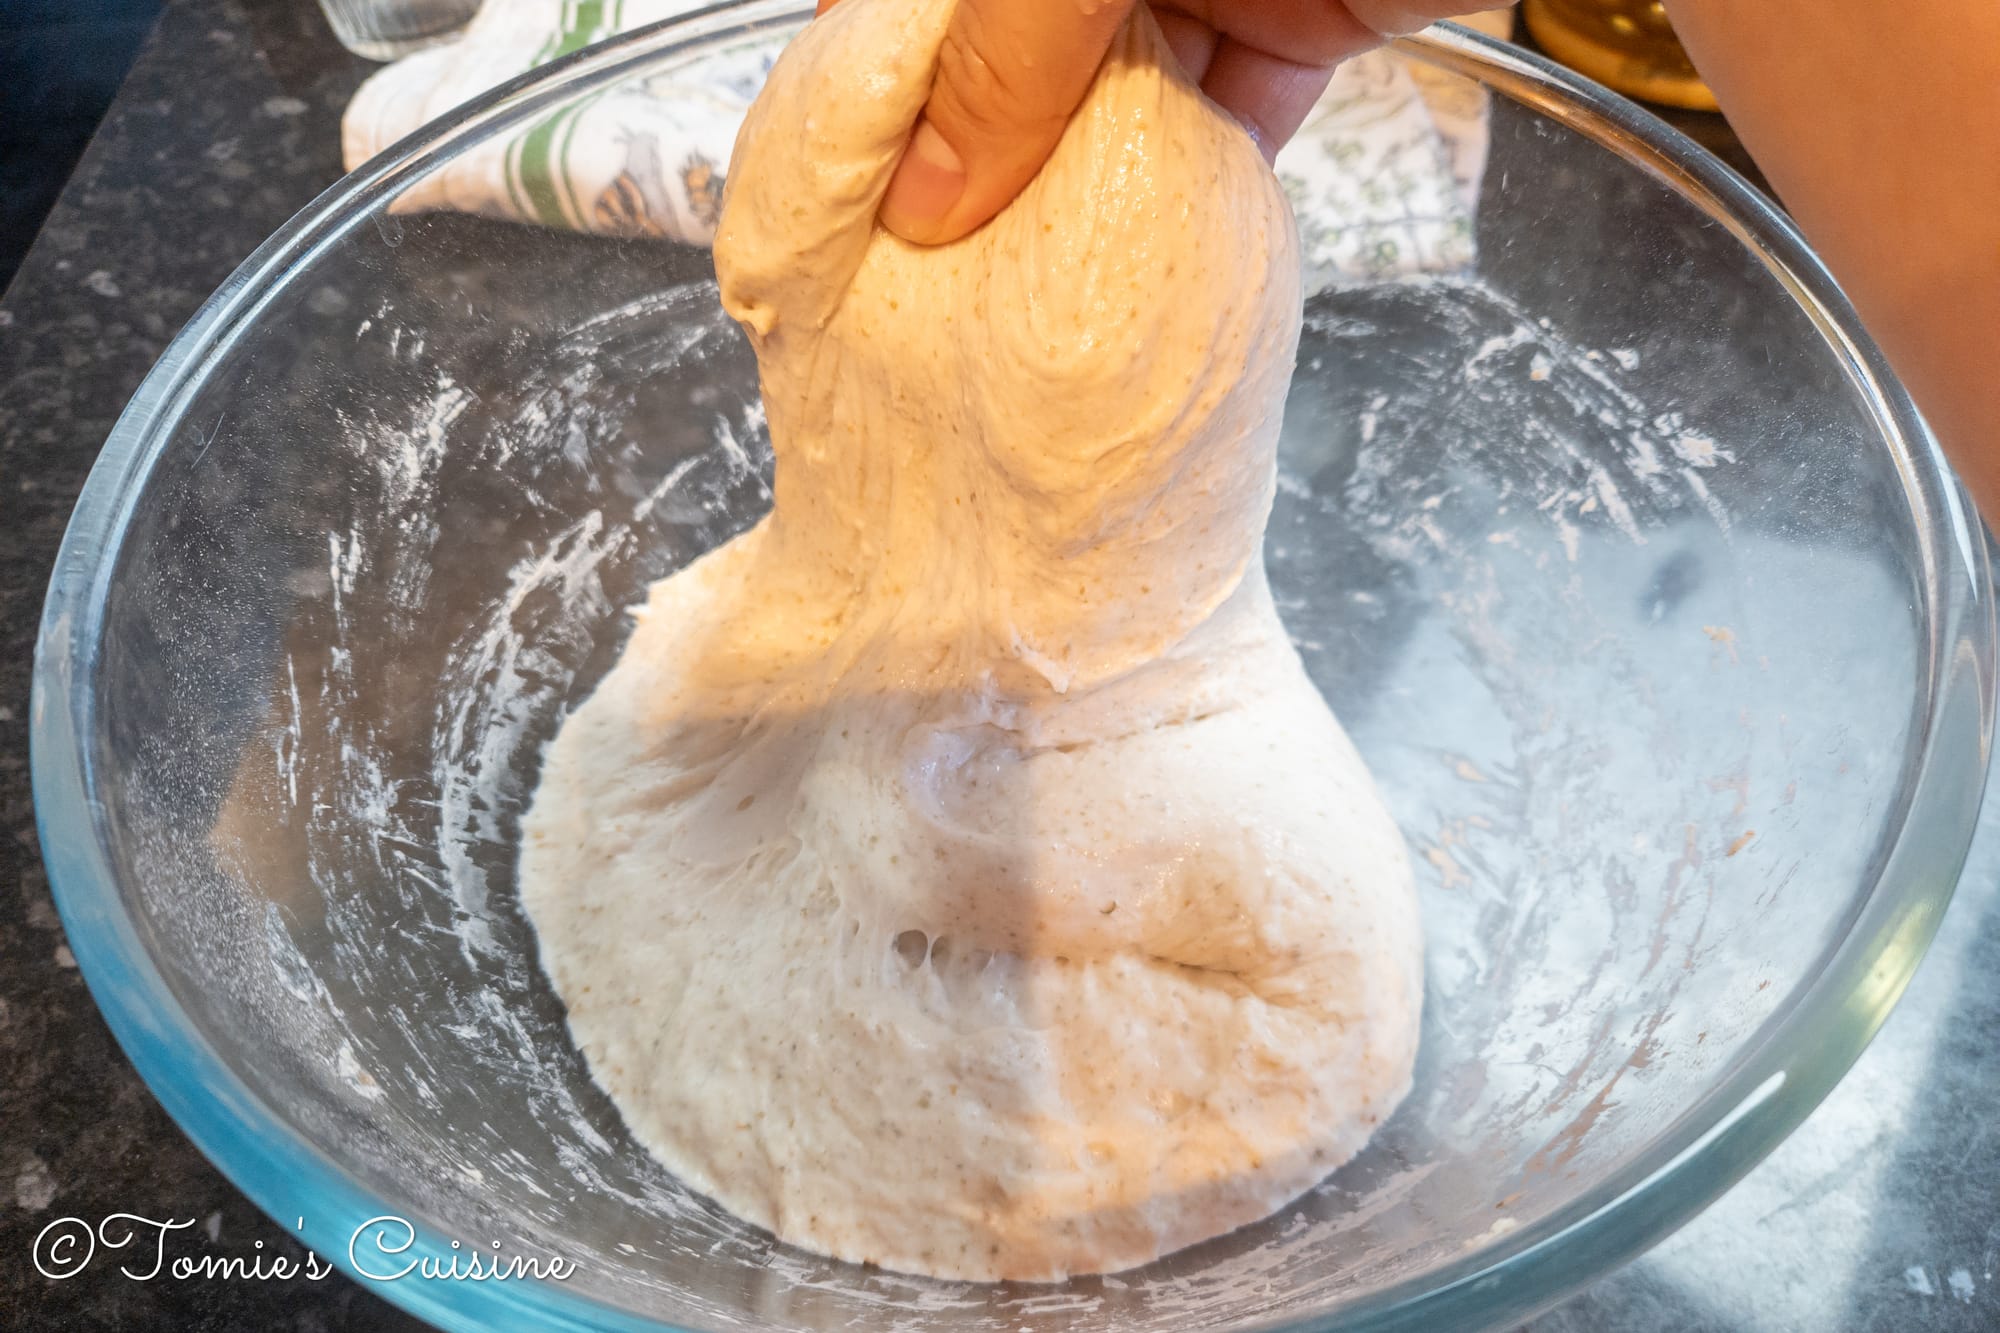
Stretch and fold: With wet hands, grab one side of the dough, stretch it upward as far as it will go without tearing, then fold it over the centre. Rotate the bowl 90 degrees and repeat. Four or more folds make one set.
Coil fold: Slide both hands under the centre of the dough, lift it so the ends fall, then lower it back onto the bowl and tuck the ends under. Rotate 90 degrees and repeat. This is gentler than stretch-and-fold and works well once the dough has developed some structure.
The windowpane test: how to check if the gluten is fully developed
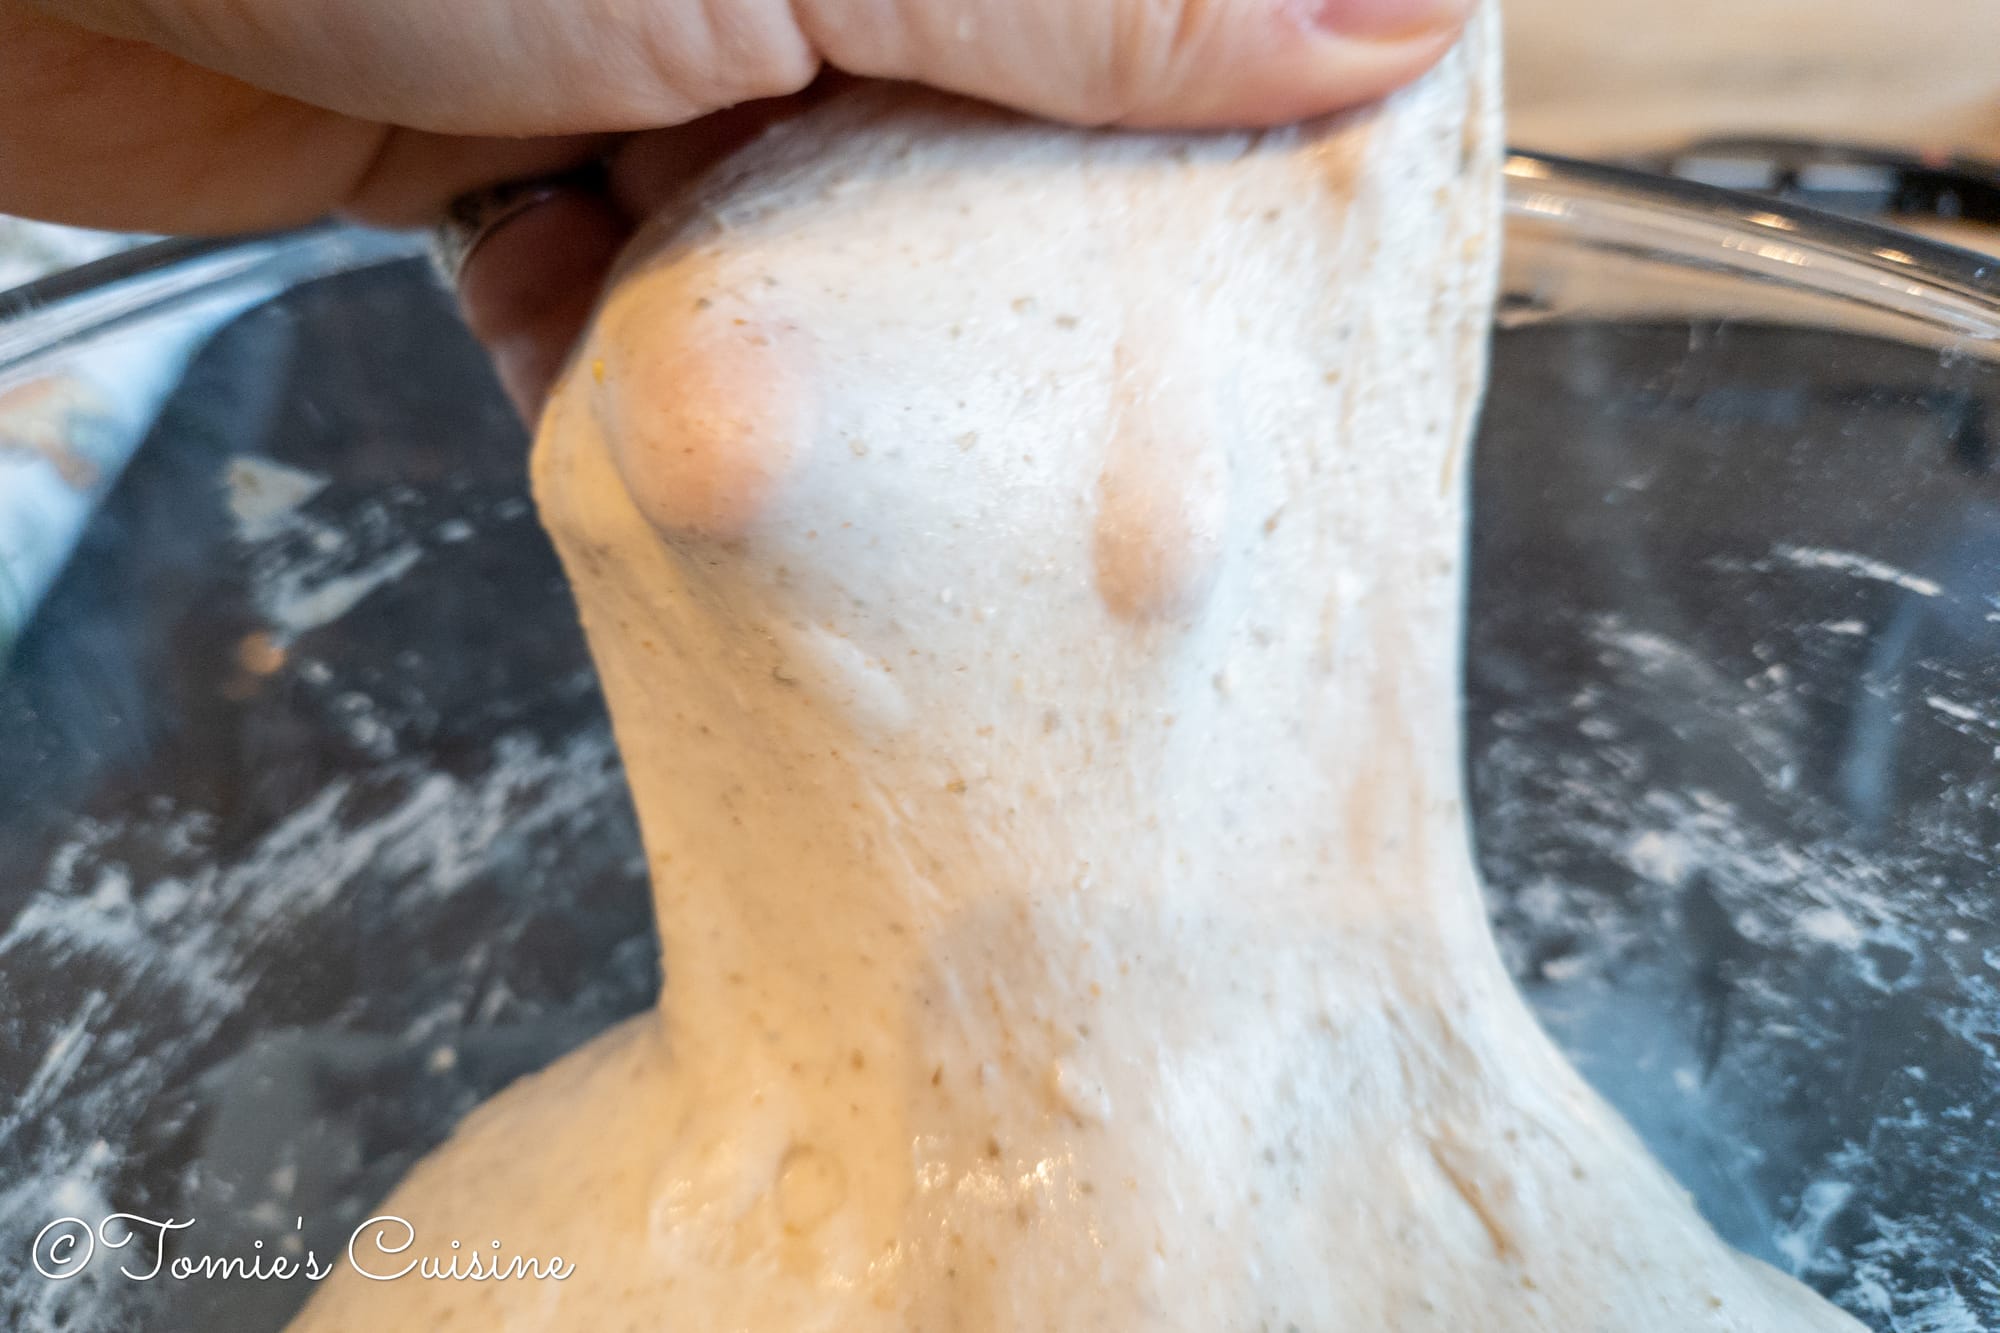
There is a technique called the "windowpane test." Take a small piece of dough and stretch it slowly into a thin, translucent membrane. If you can do that without it tearing, the dough is strong enough and ready to move on. If it tears, give it another fold and rest.
Once you have finished the stretch-and-fold, the next step is bulk fermentation.
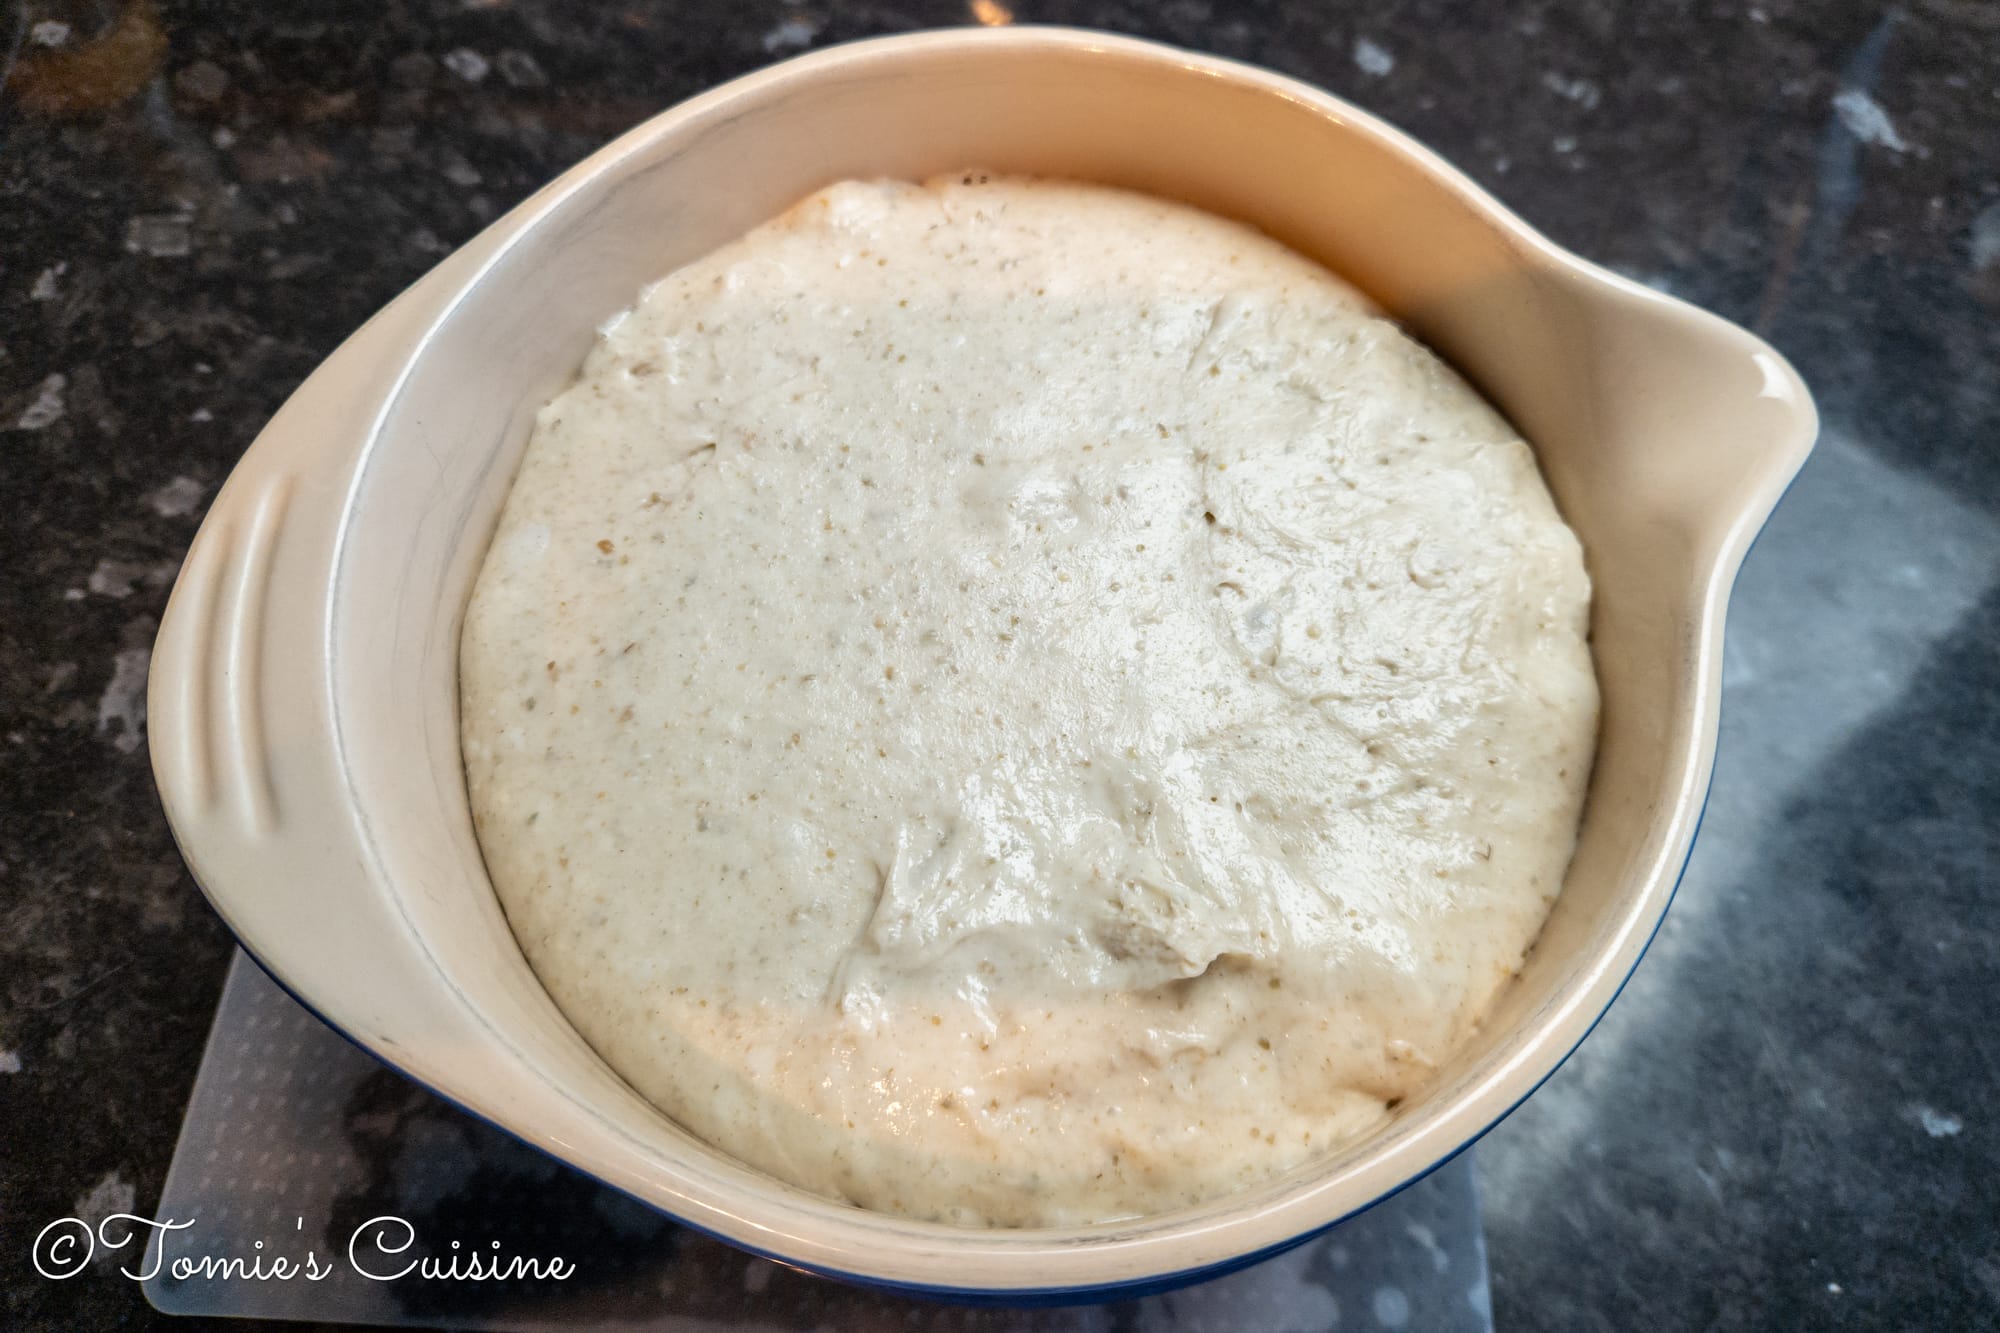
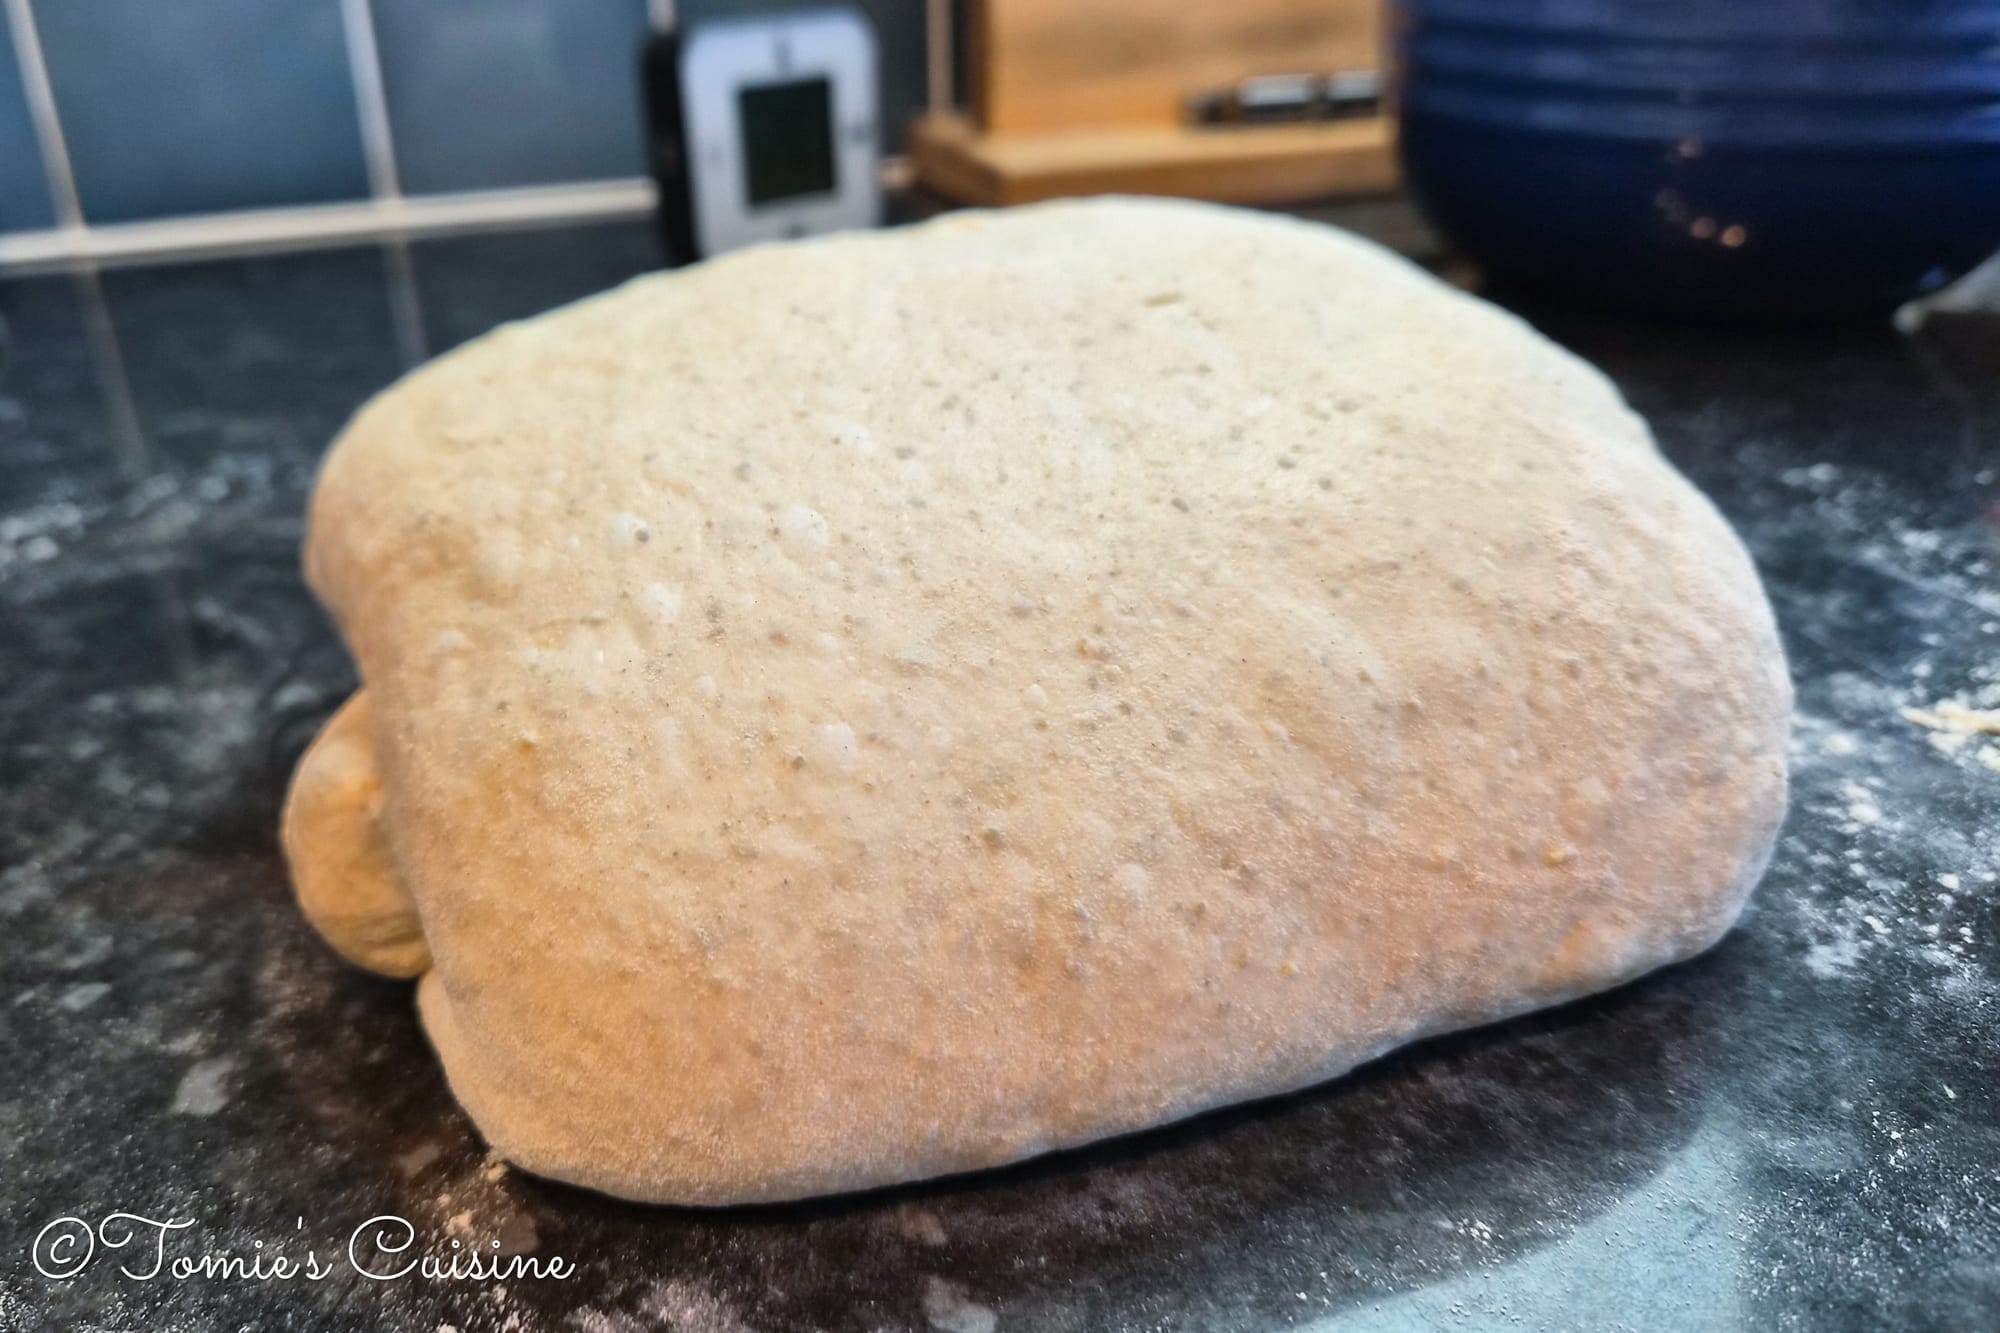
Bulk fermentation: what it is and how to know when it is done
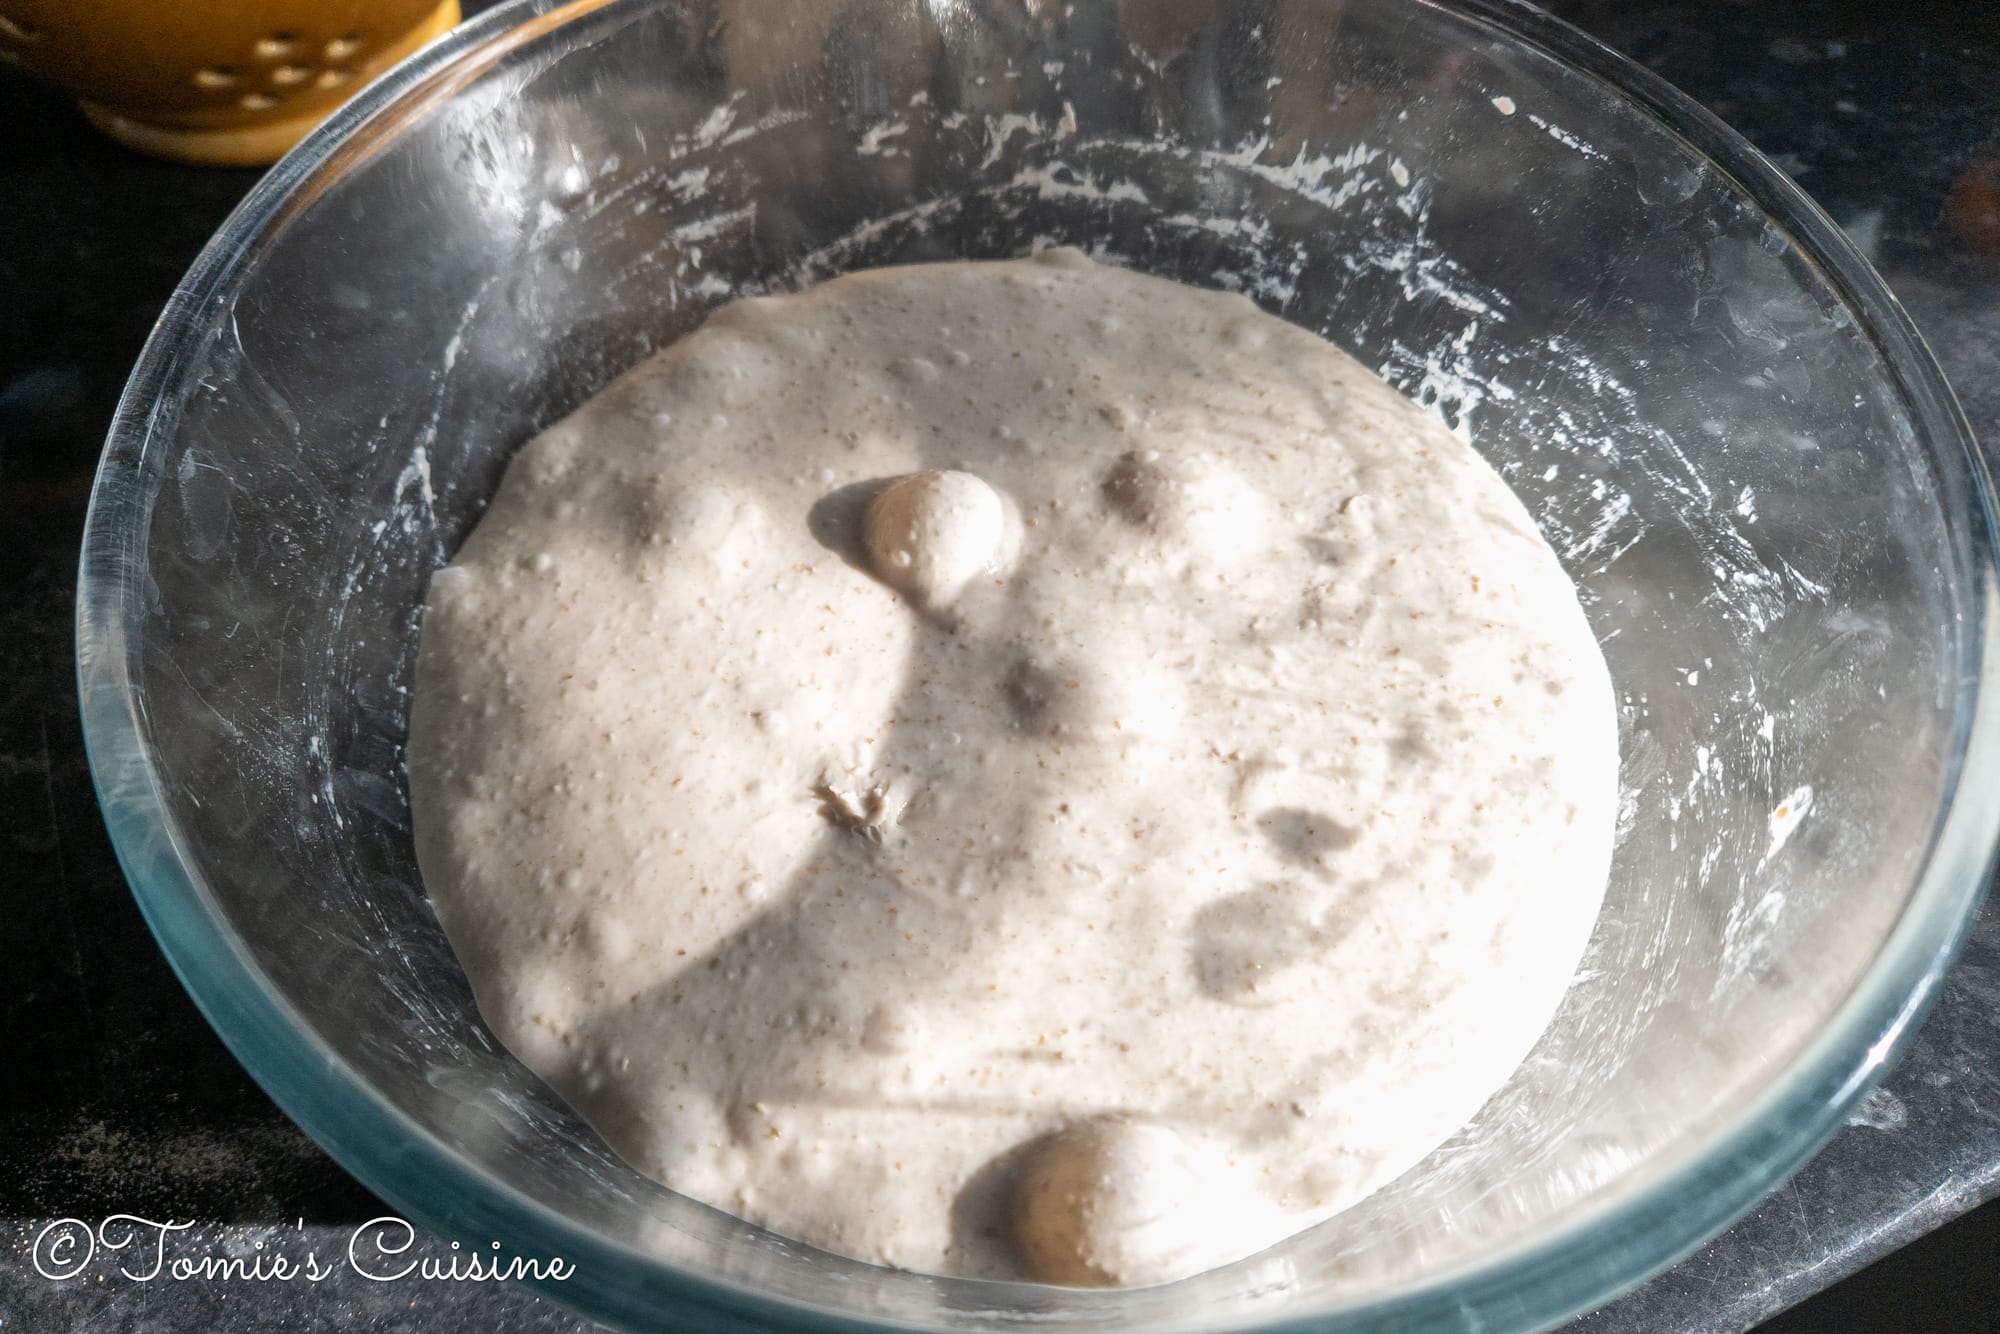
Bulk fermentation is the long resting period during which the entire batch of dough ferments as one mass. During this process:
- The yeast feeds on the sugars in the flour and produces CO₂, which makes the dough rise and become airy.
- The gluten network strengthens, giving the dough structure and elasticity.
- The bacteria (mainly Lactobacillus) produce lactic and acetic acids, which develop that signature sour flavour and complex taste.
This stage has a big impact on the final result. Under-fermented dough won't rise much and will produce gummy bread. On the other hand, over-fermented dough will lose its gluten structure. It becomes sticky and difficult to handle, and the baked loaf often turns out flat, dense, or gummy. In terms of flavour, over-fermentation also tends to produce a sharper sour taste.
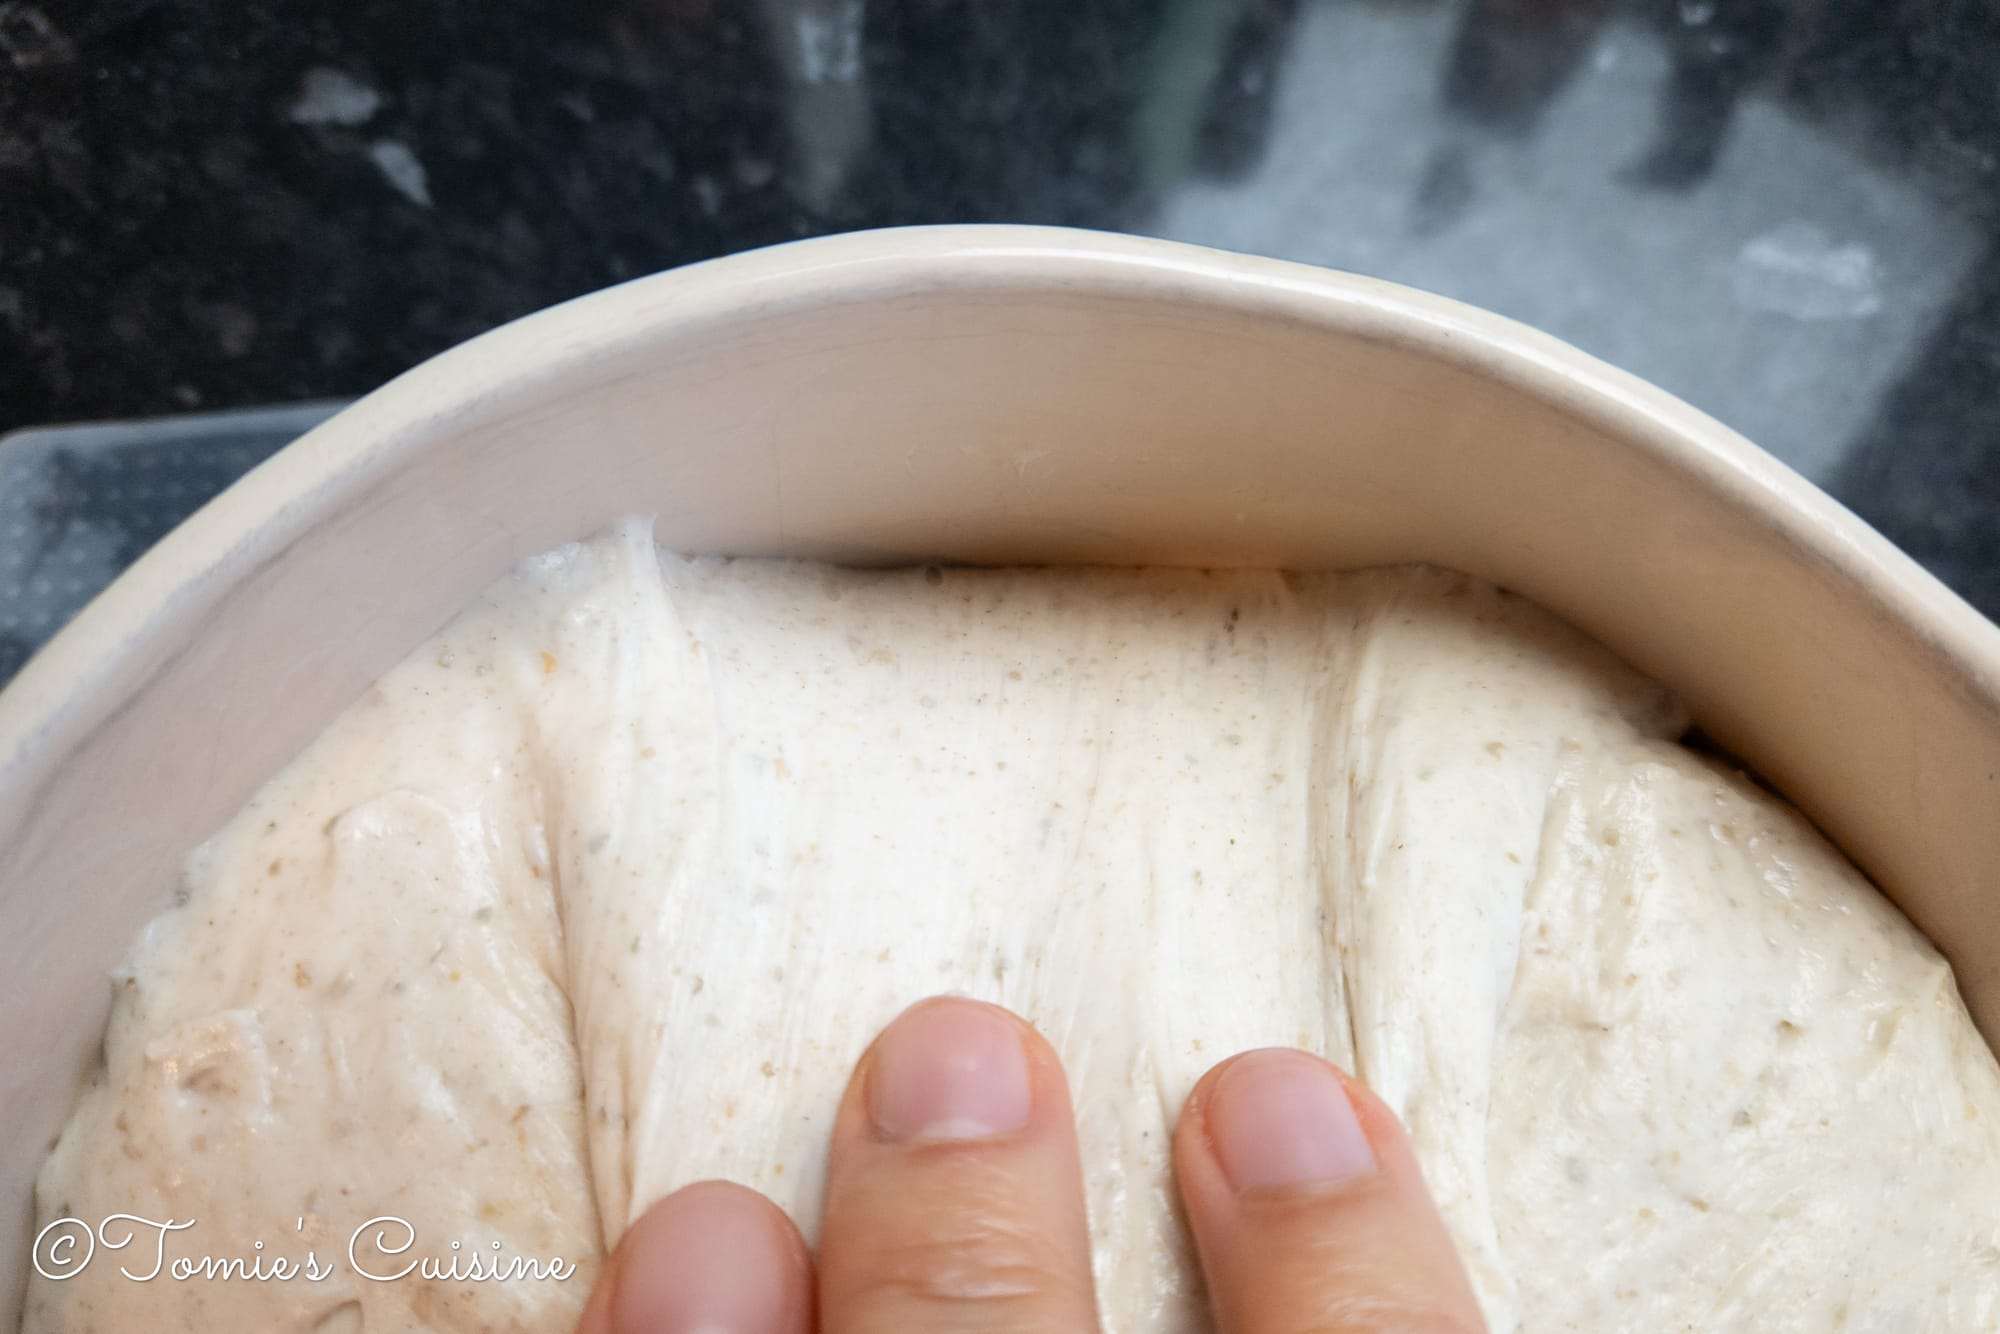
How to tell when bulk fermentation is done:
- You can see the bubbles on the surface and the side of the bowl. (We recommend using a glass bowl)
- A domed edge around the dough
- When you gently pull the dough away from the side of the bowl, it comes away smoothly
- It doesn't stick to your fingers
The fermentation time always changes with temperature and humidity, so I’m following those signs as indicators for now. I will update here when I find the best way to identify the end of bulk fermentation!
Shaping the dough
There are different ways to shape the dough, and what I recently learned is that we shouldn’t overwork it; we should handle it gently so it creates enough tension on the surface.
- Dust the surface of the dough and the cleaned kitchen countertop with some flour.
- Gently scrape the dough from the bowl to help it release easily without damaging it.

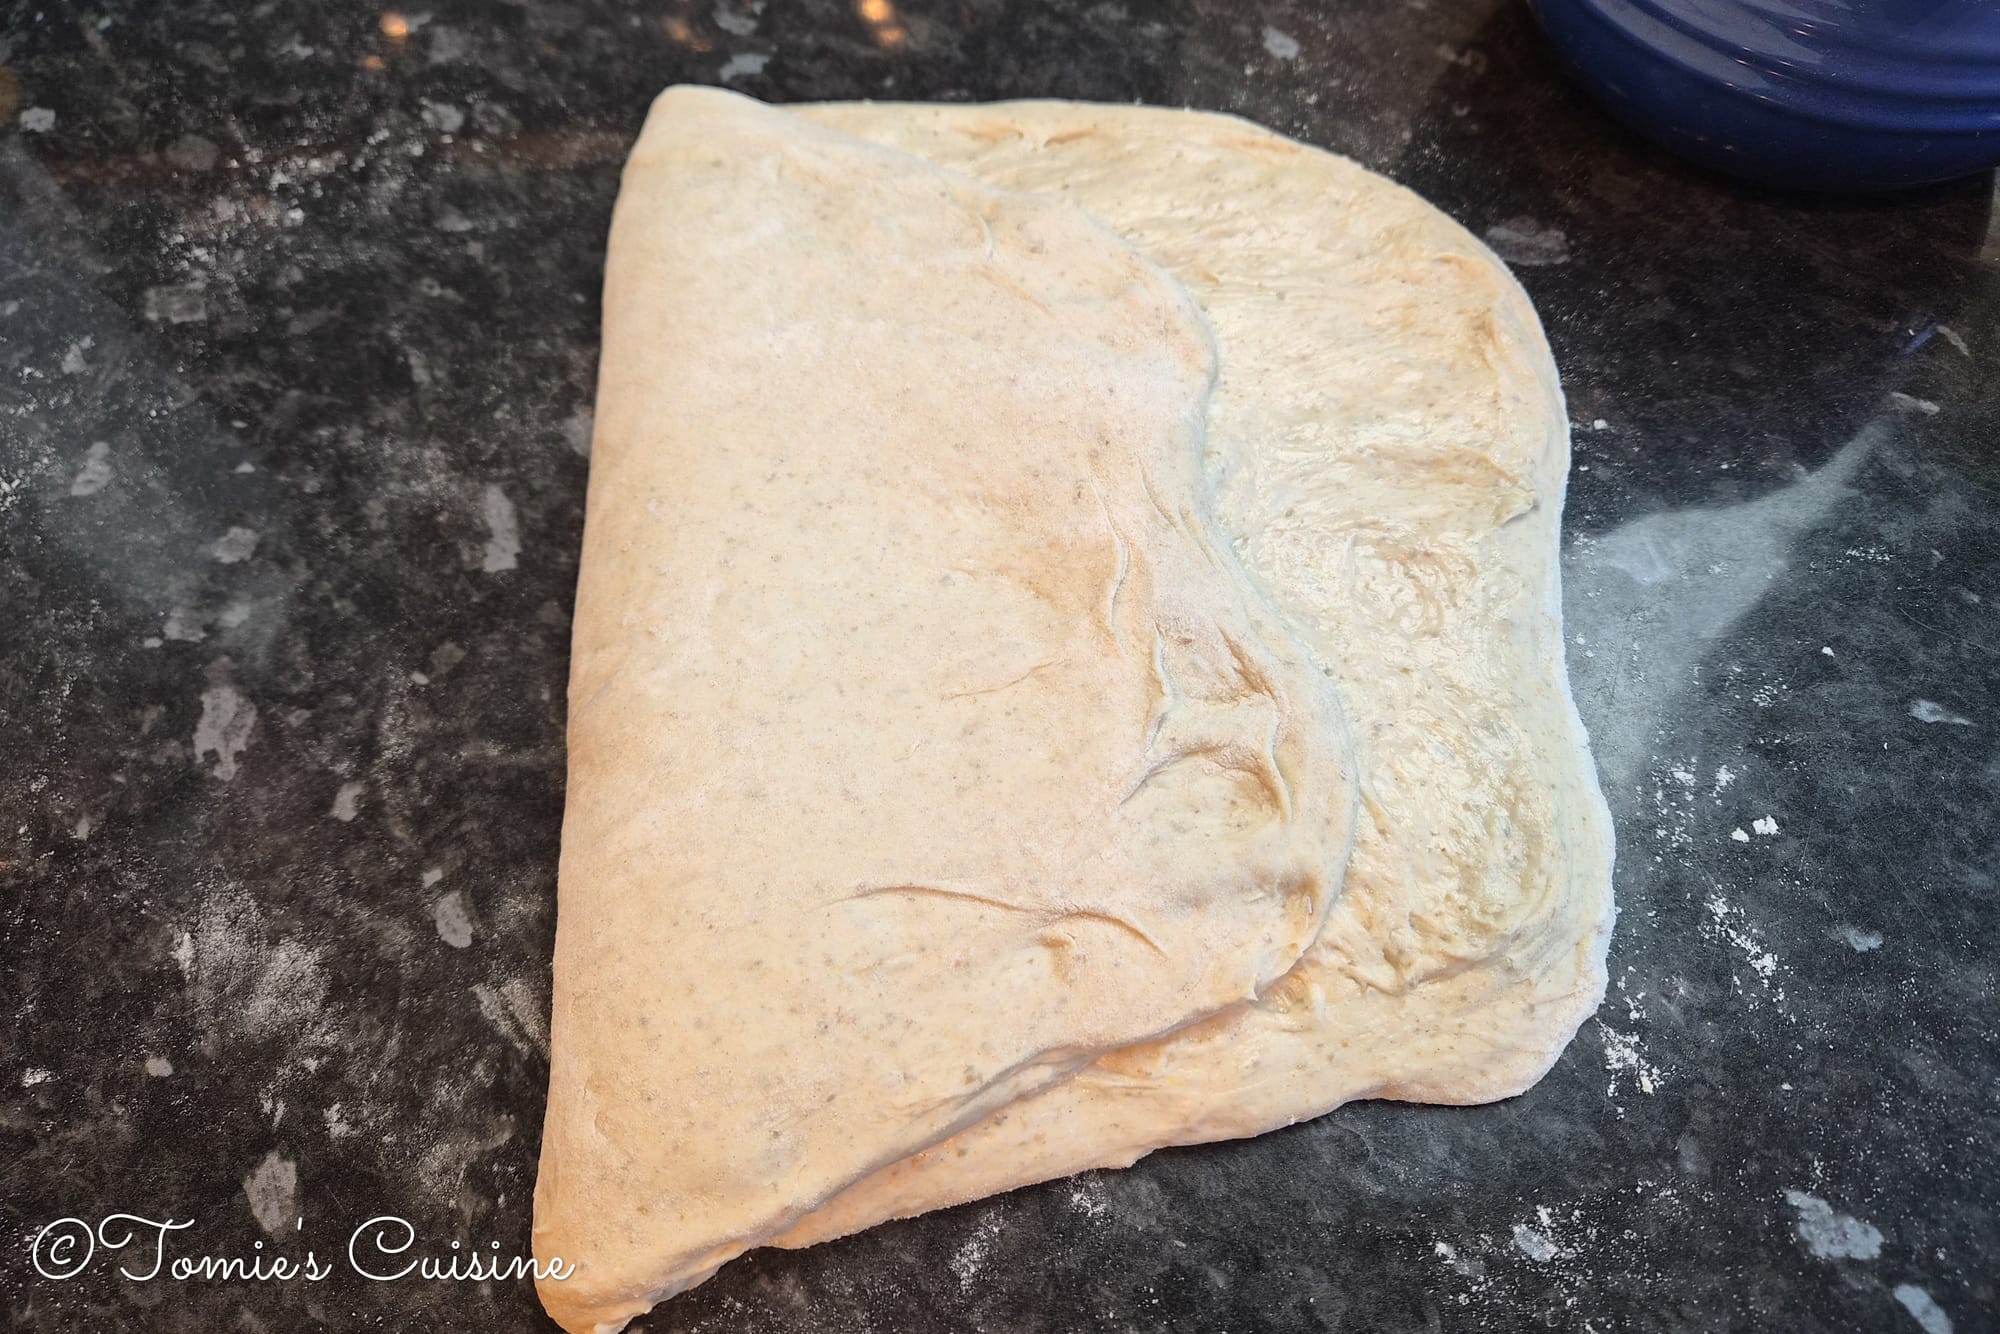
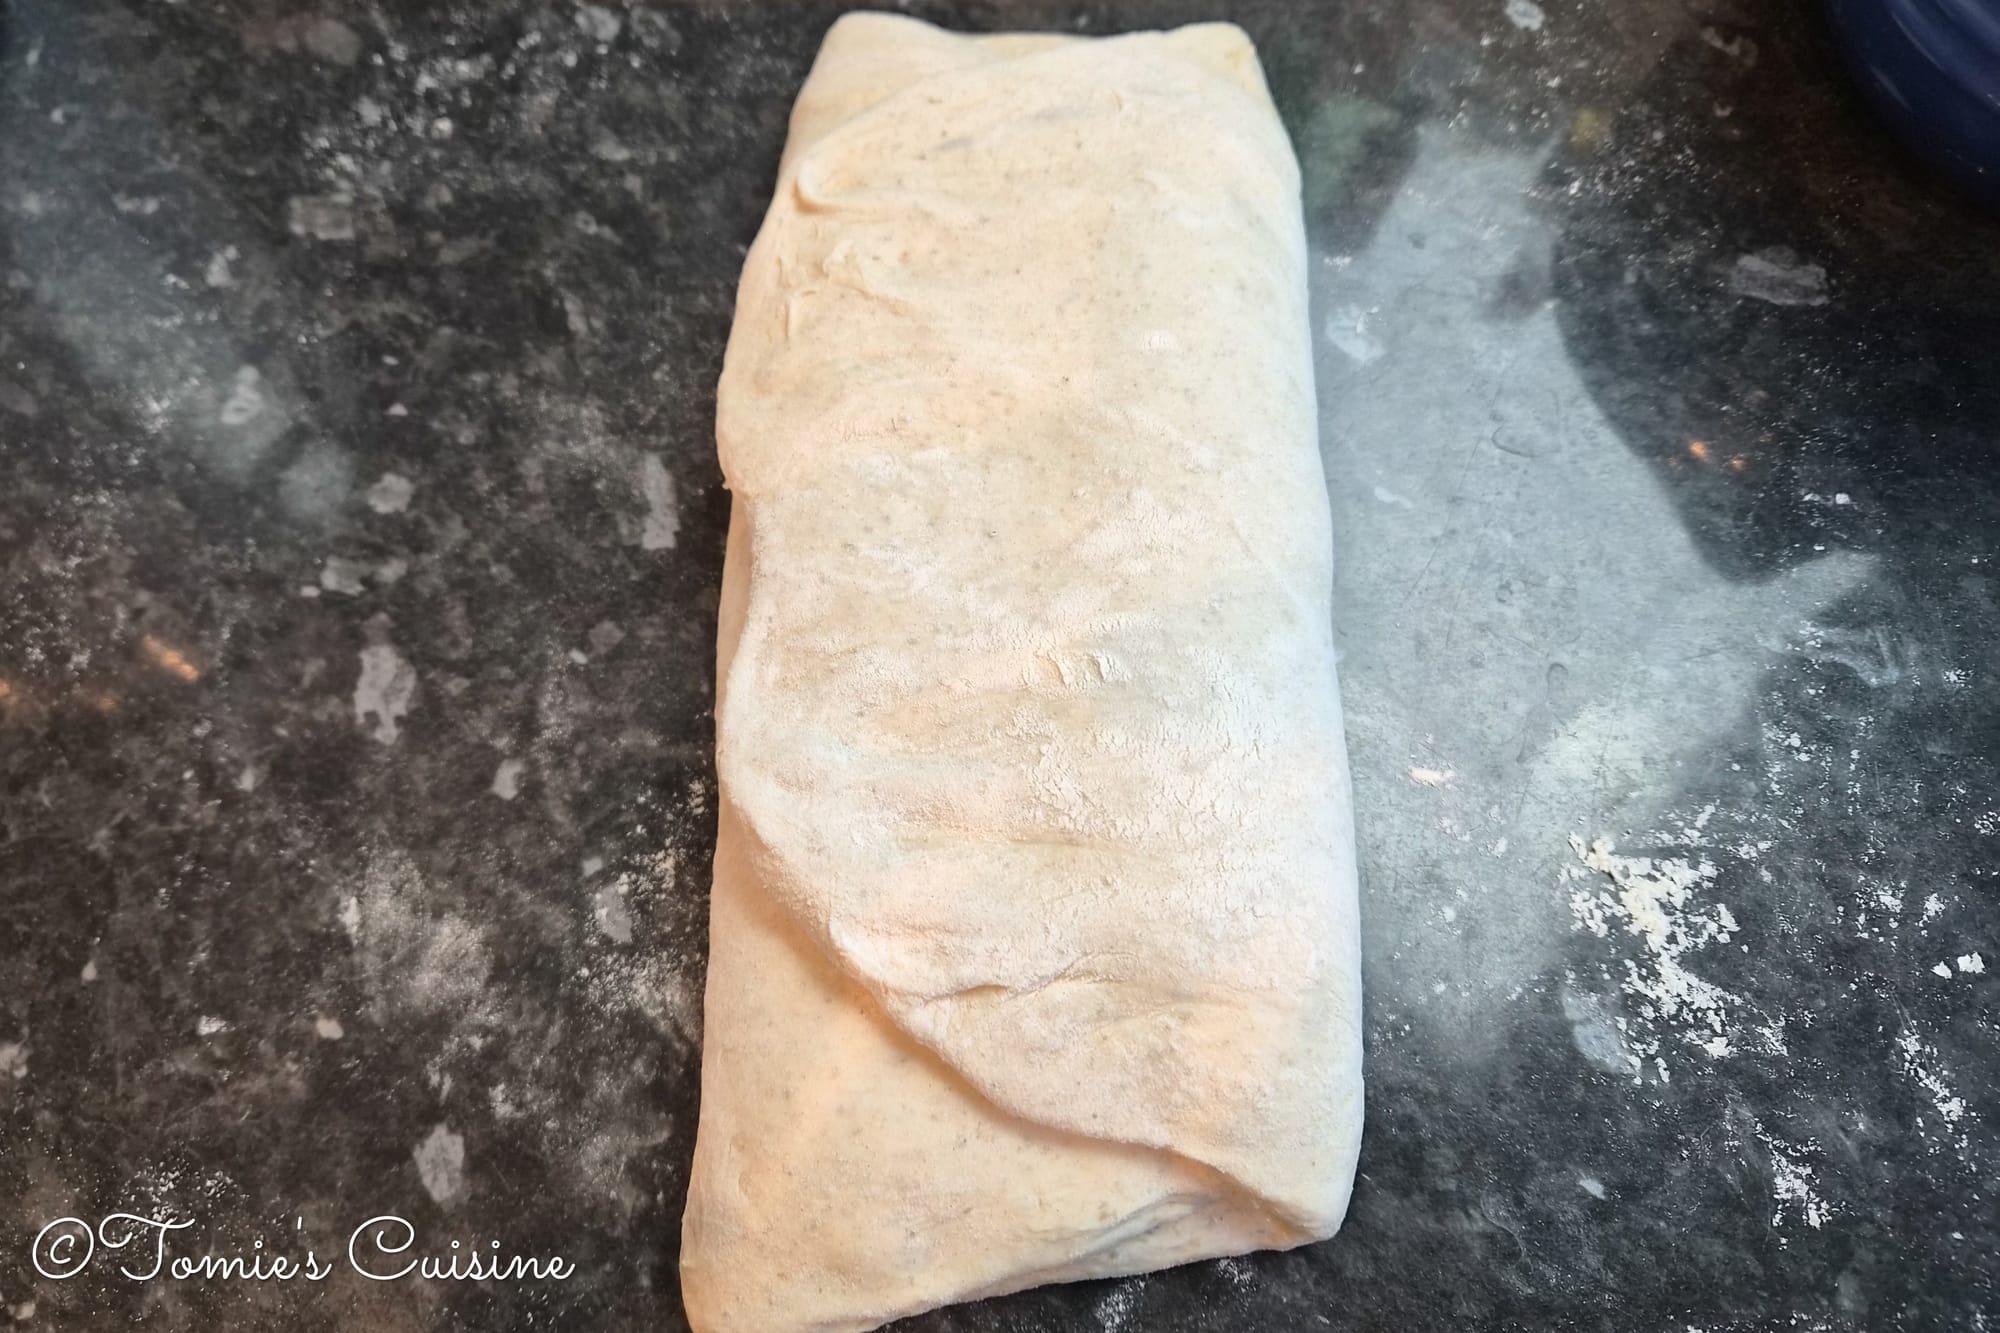
- Gently stretch the dough and start shaping.

- To build enough surface tension in the dough, move it around a little.
- Leave it to rest for about 15 to 20 minutes.
- Prepare your bowl or colander with a tea towel, then sprinkle some flour and set it aside for the cold fermentation.
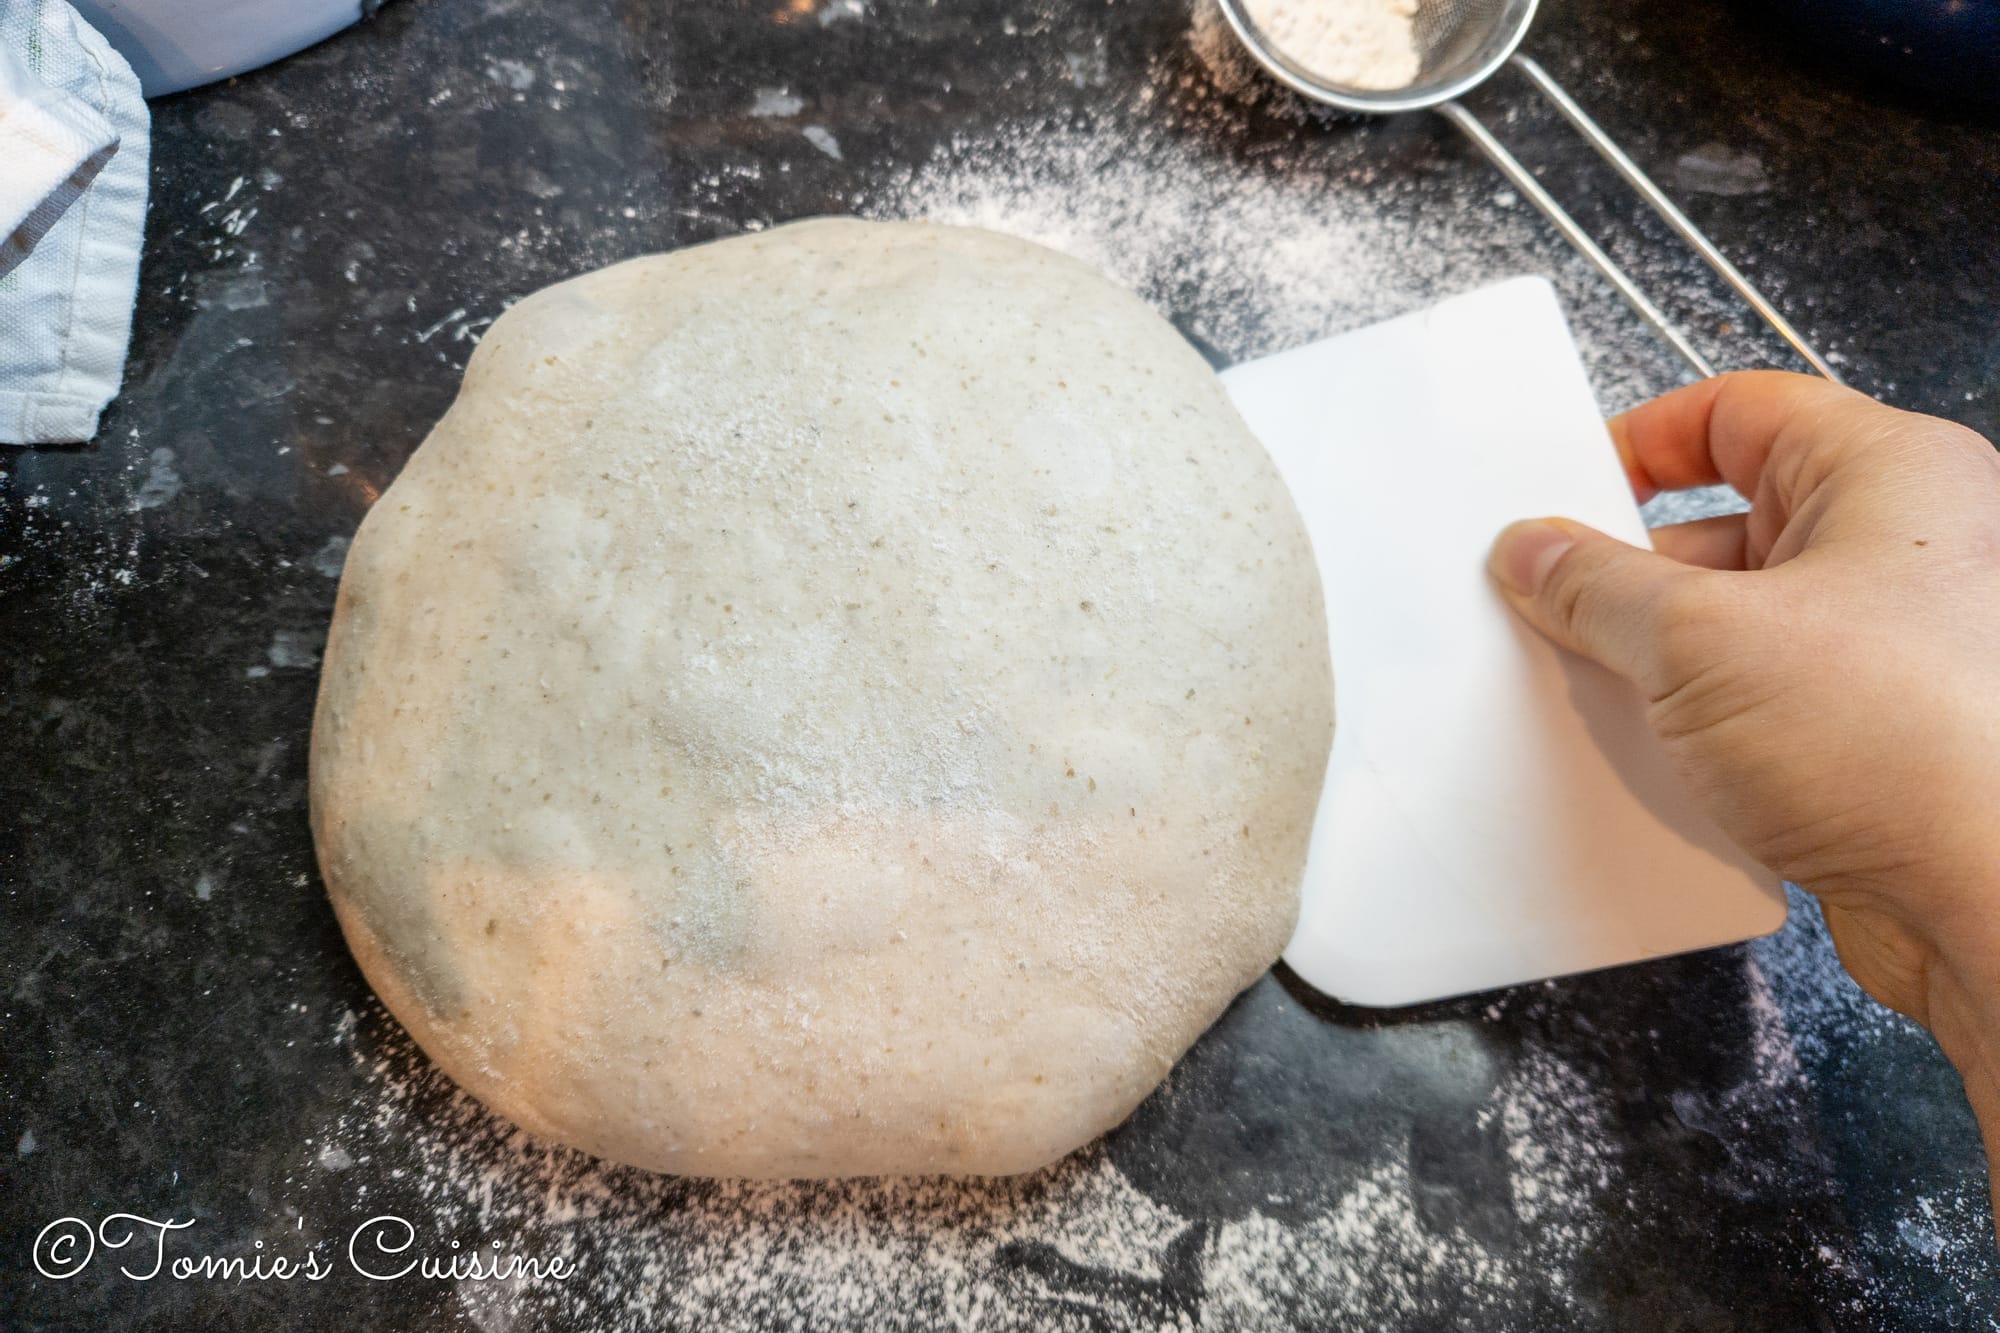

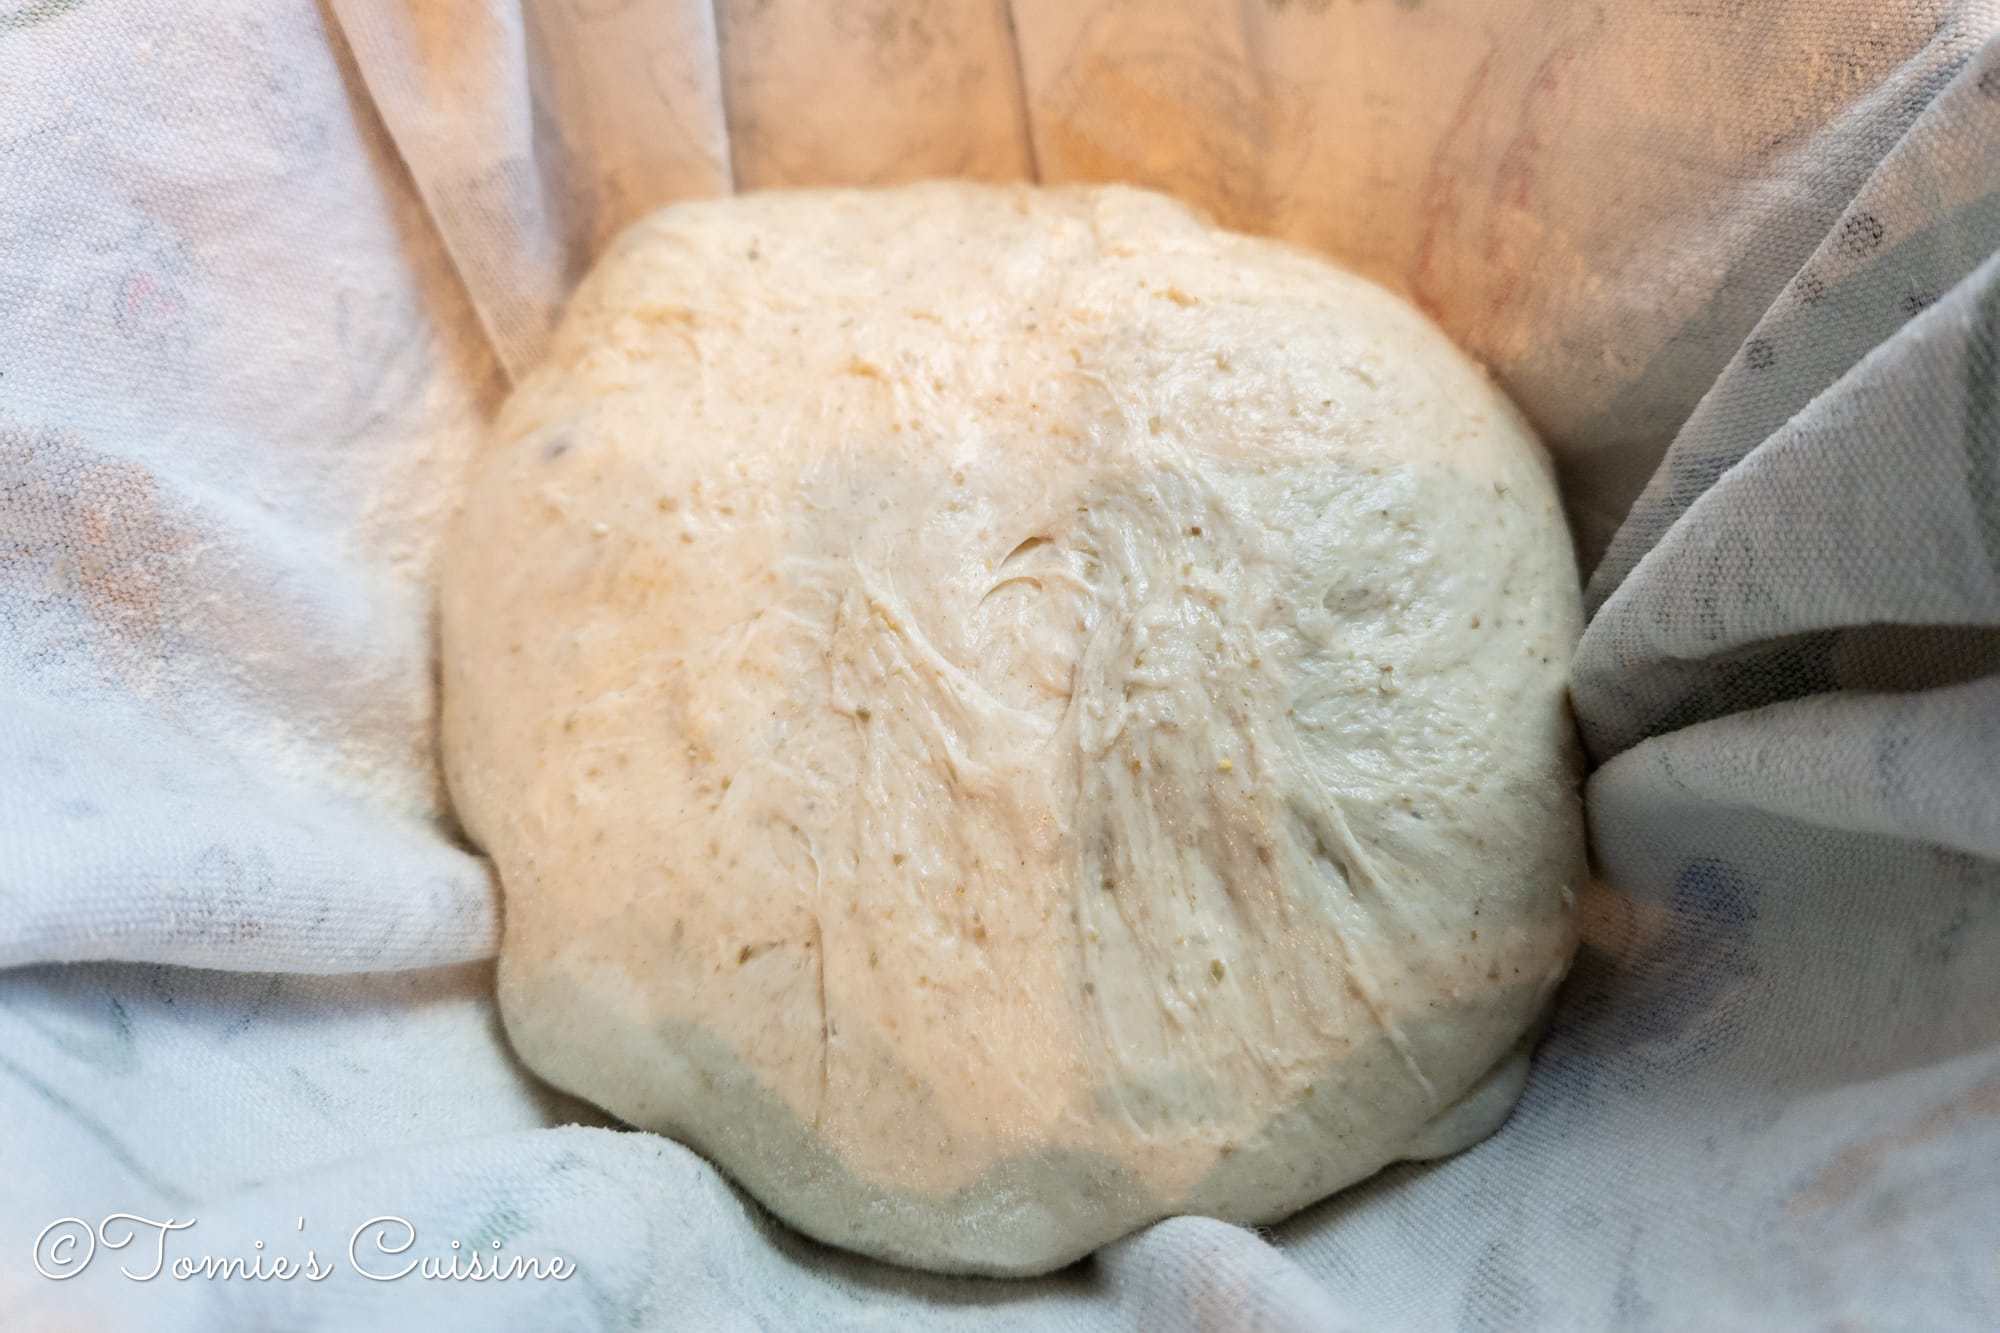
- Do the final shaping, then place the dough seam-side up on the tea towel in the bowl and refrigerate overnight or for up to 48 hours.
Baking
- Preheat the oven to 250°C and place the Dutch oven inside to heat up too. This takes about 30 to 40 minutes, depending on your oven.

- Once preheated, take the dough out of the fridge and place it on a sheet of baking parchment.
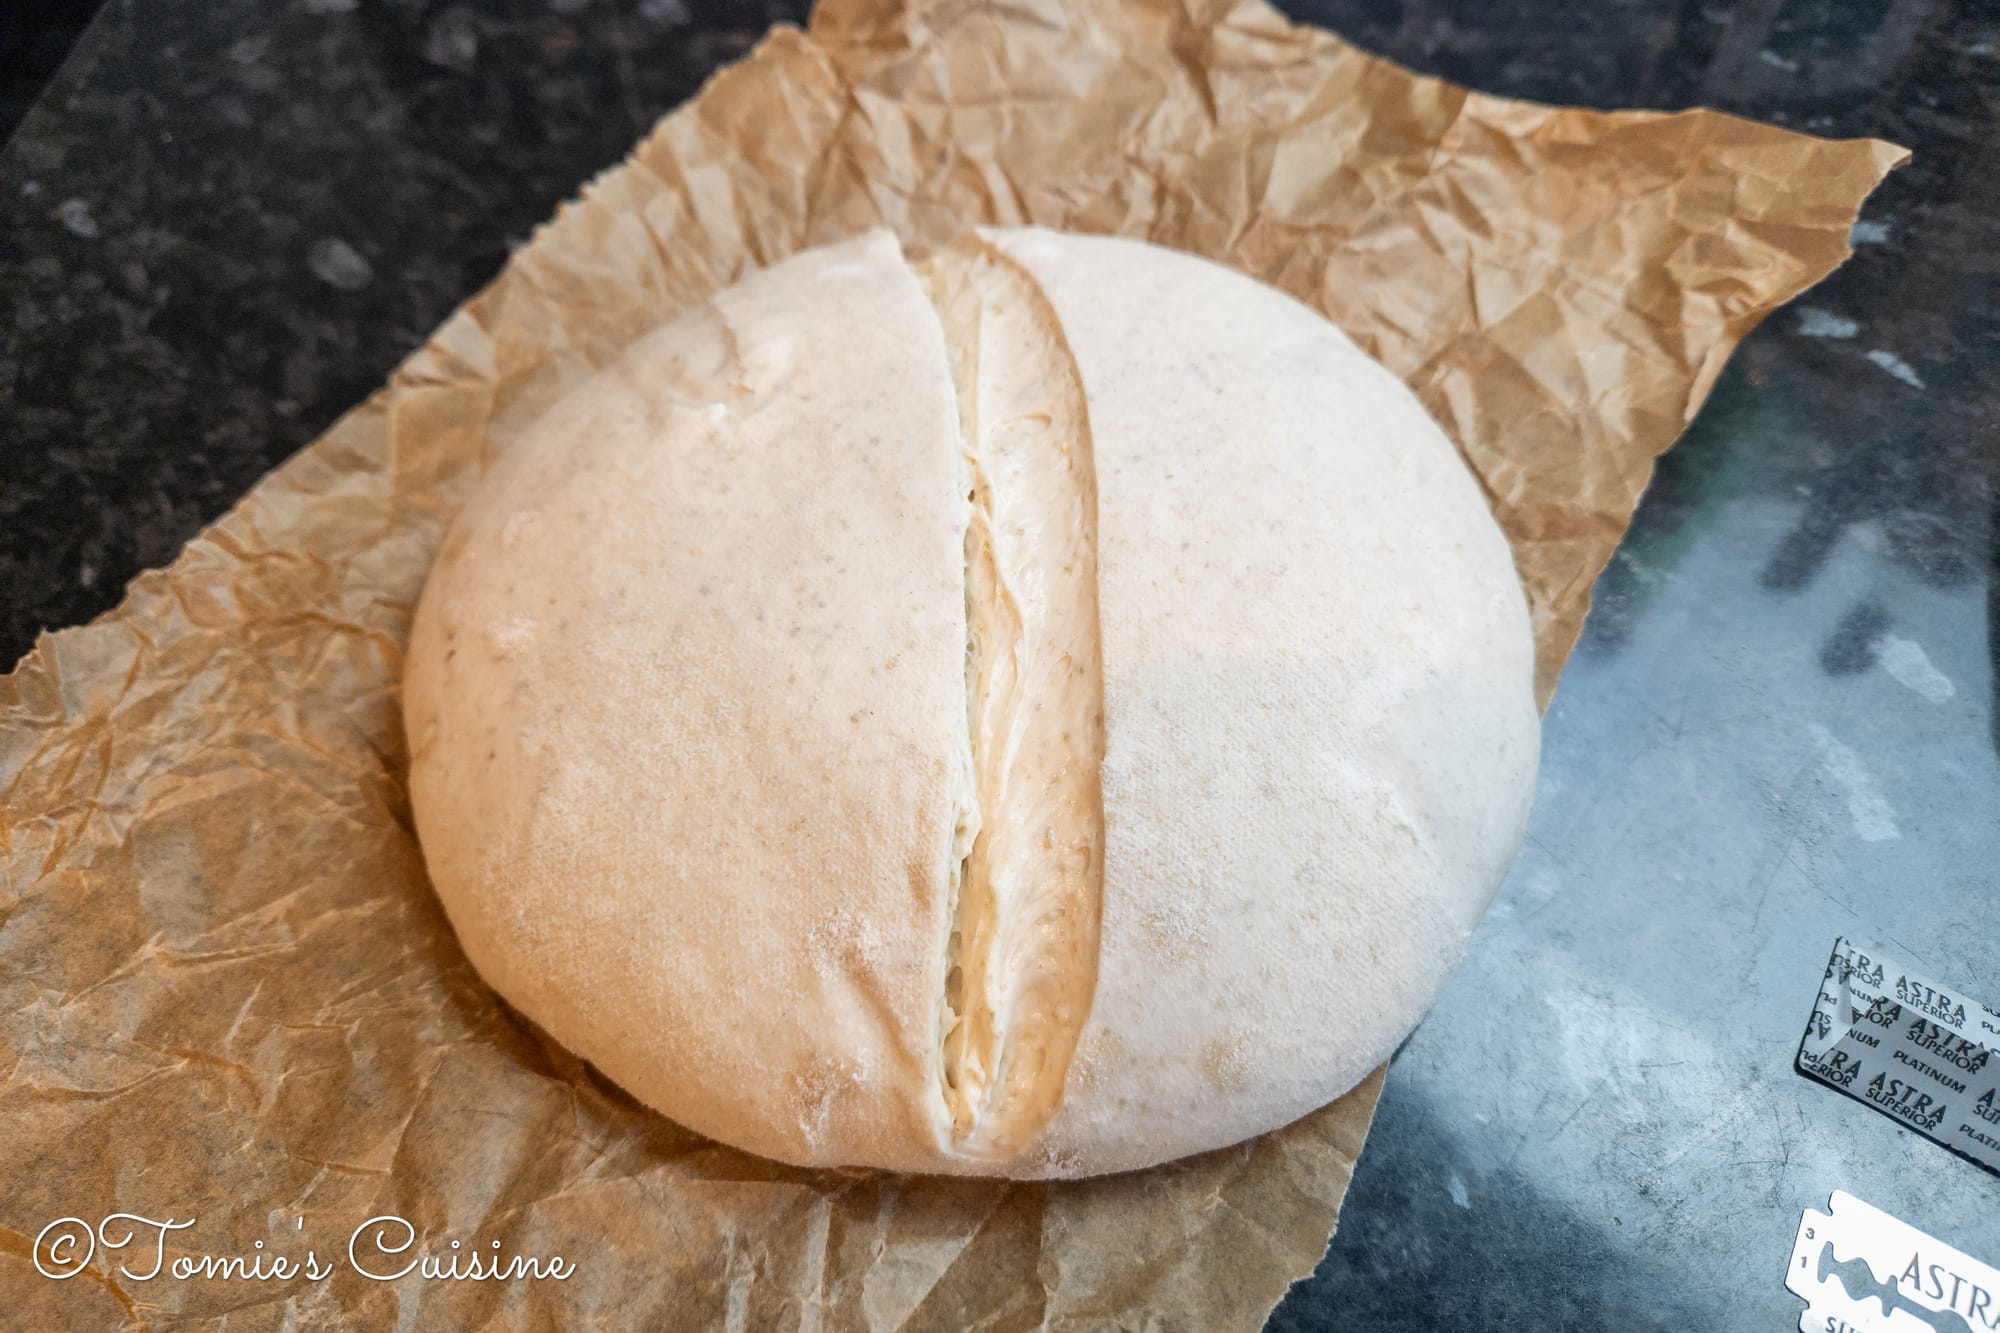
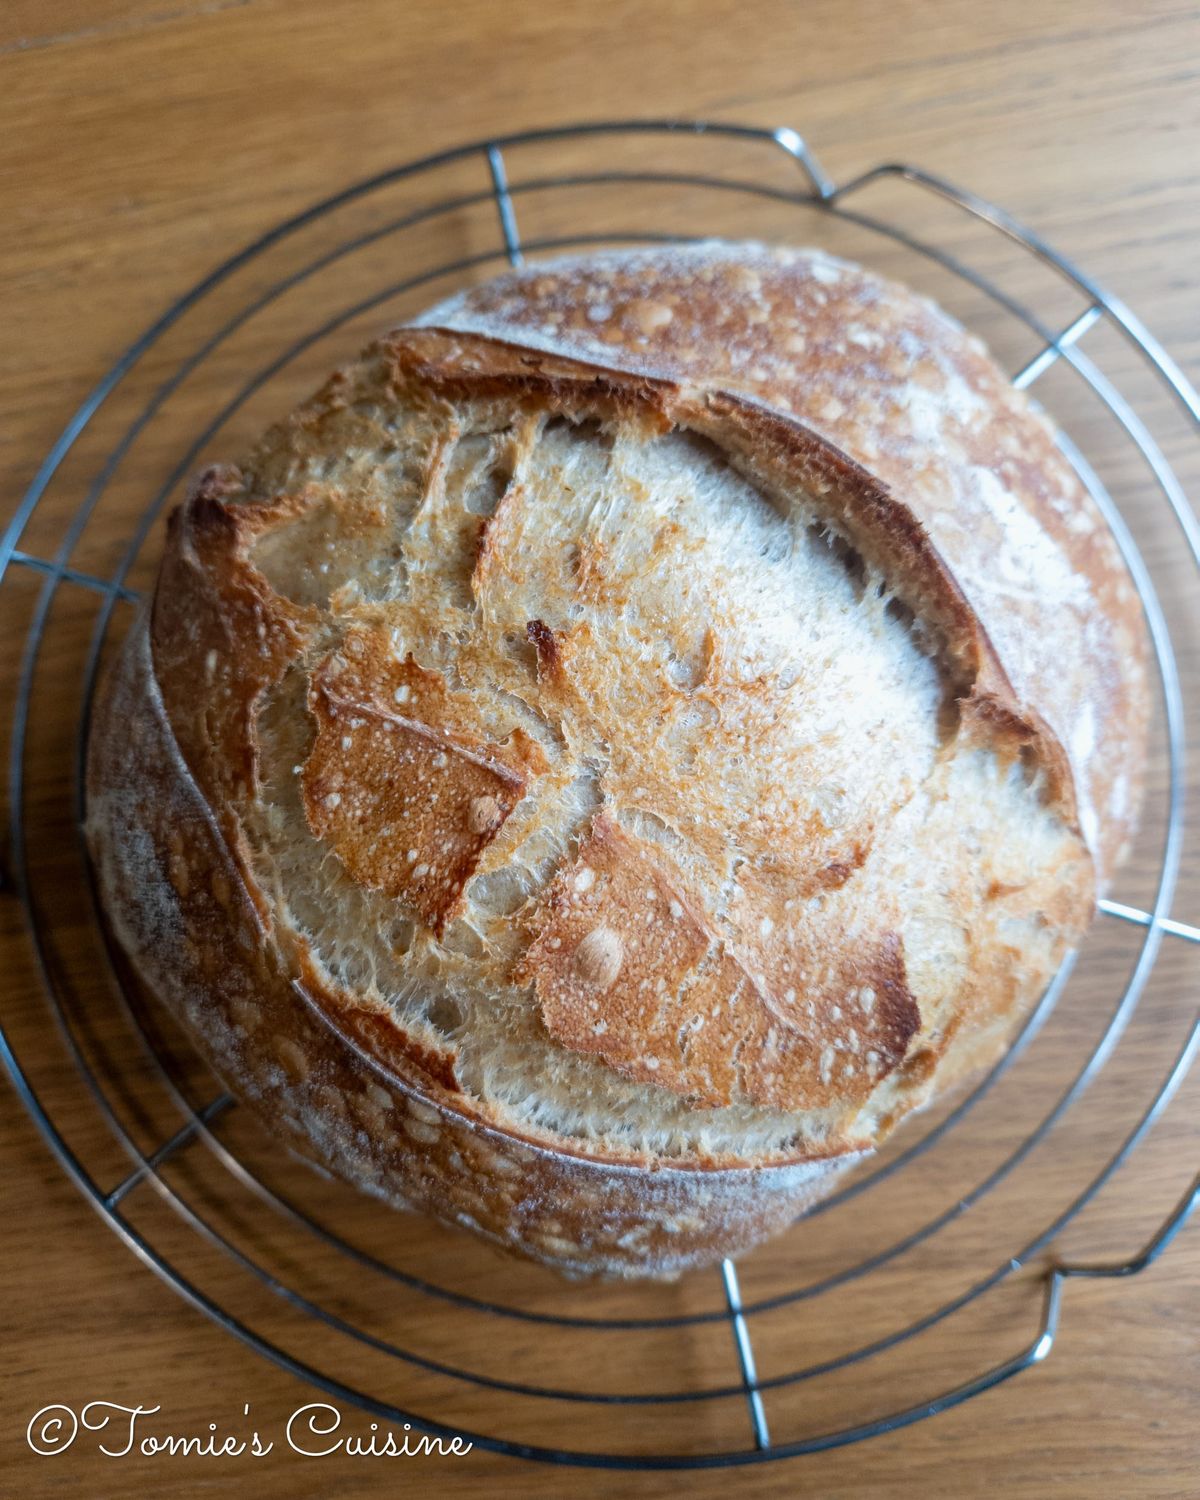
- Score a line (or your preferred pattern) on the surface of the dough. This allows the bread to expand and maximise the oven spring.
- Carefully lower the dough and parchment into the hot Dutch oven, put the lid on, lower the oven temperature to 230°C and bake for 25 minutes.
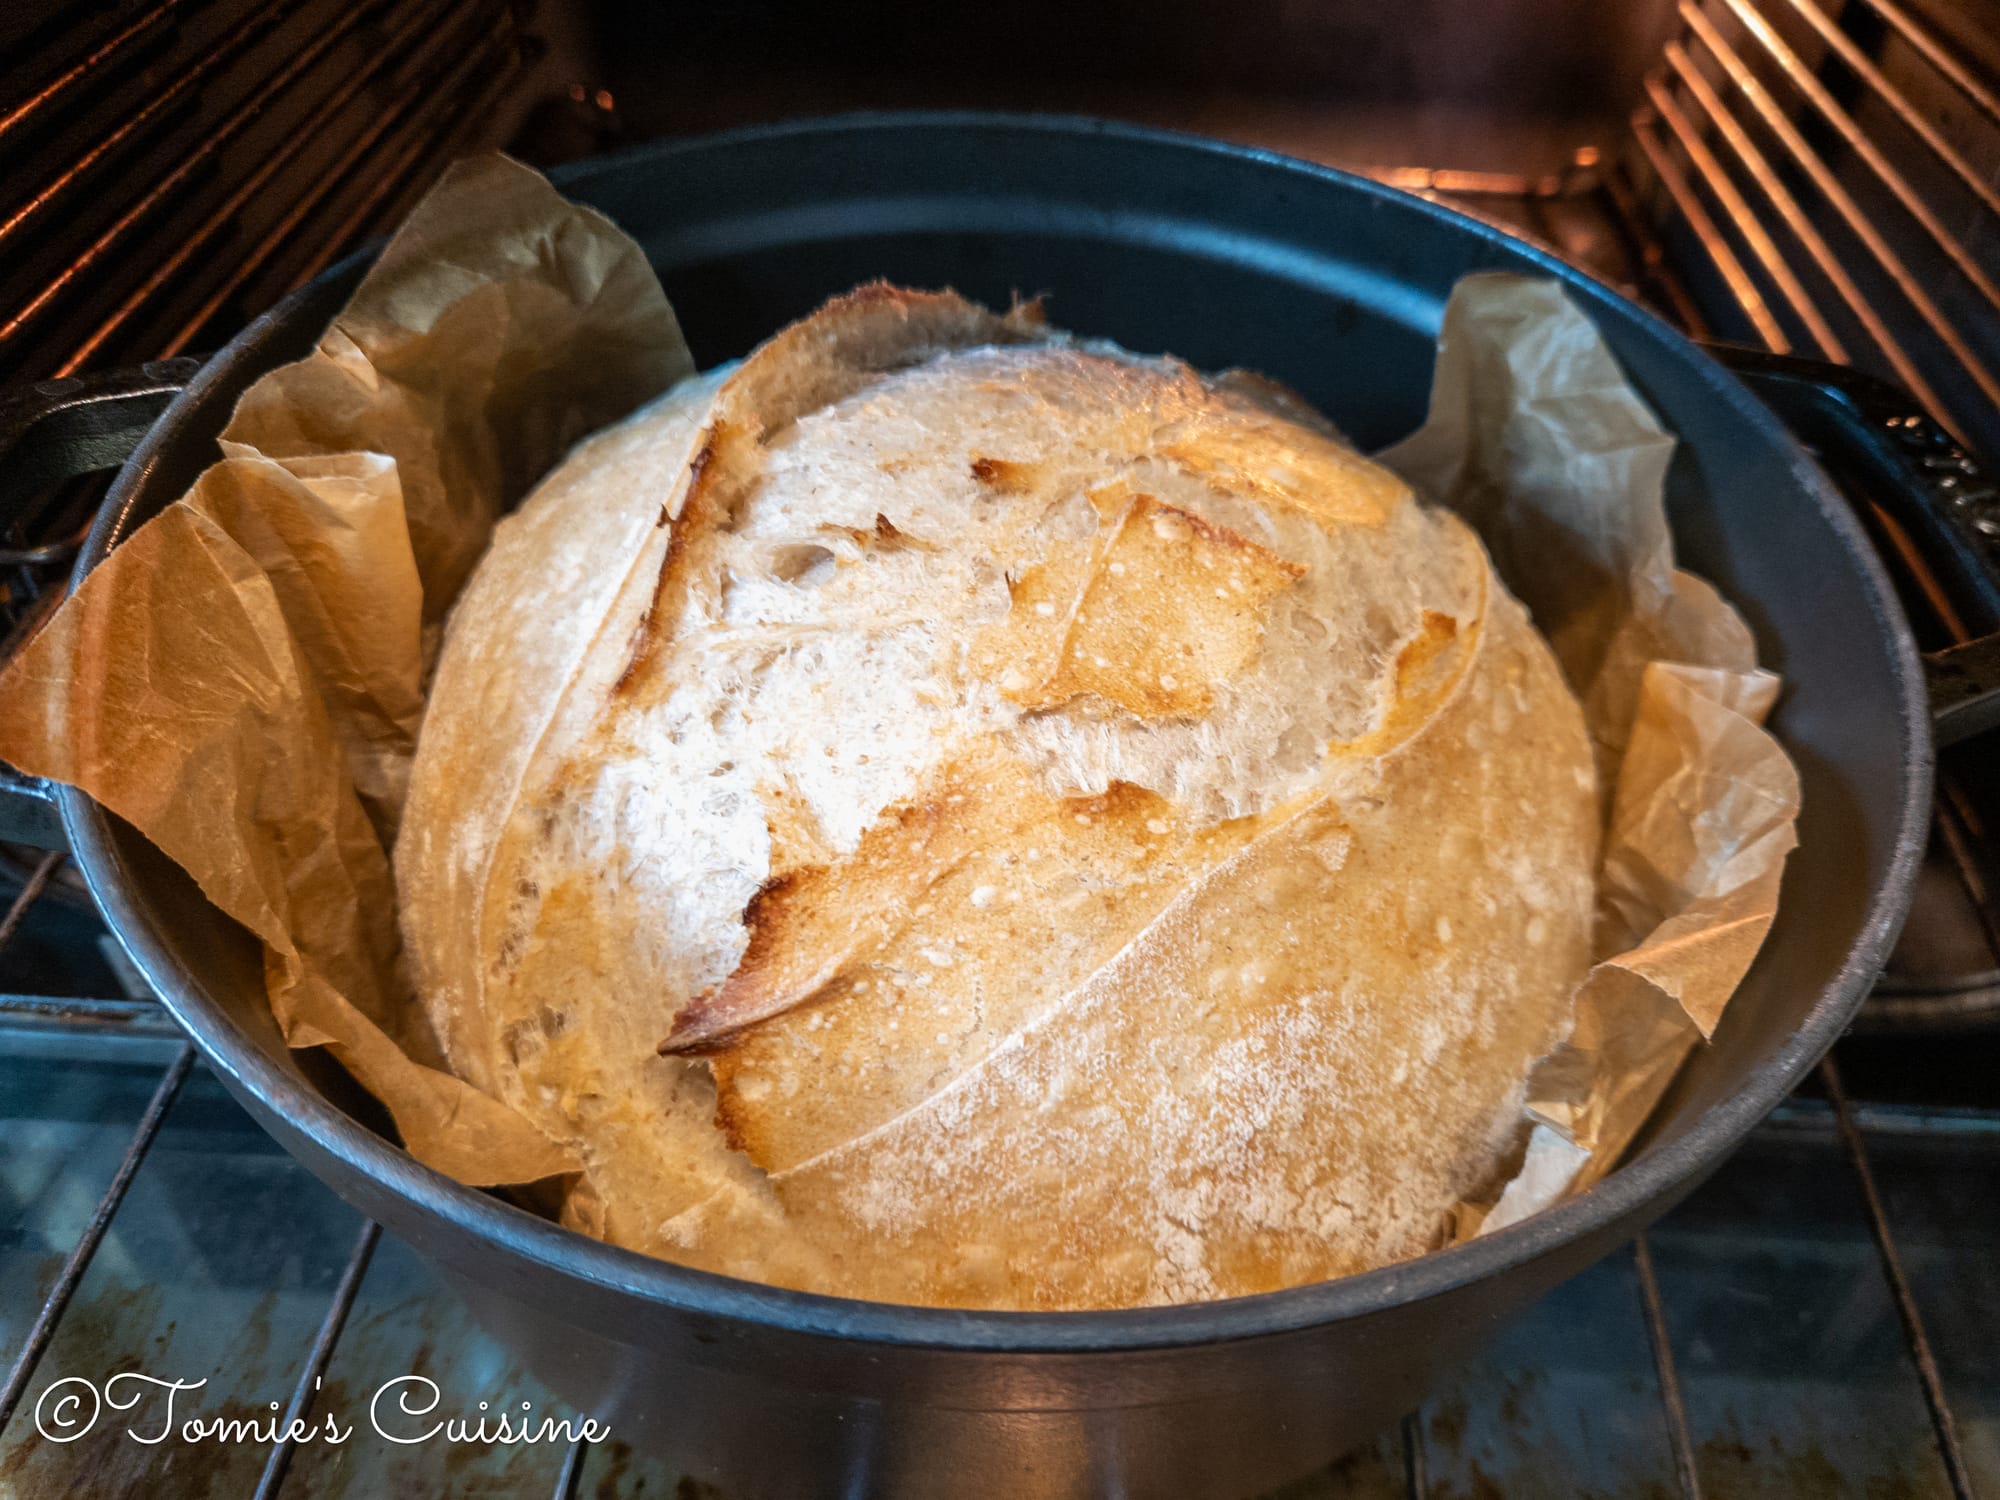
- Remove the lid, lower the temperature to 200°C, and bake for a further 20 to 25 minutes.

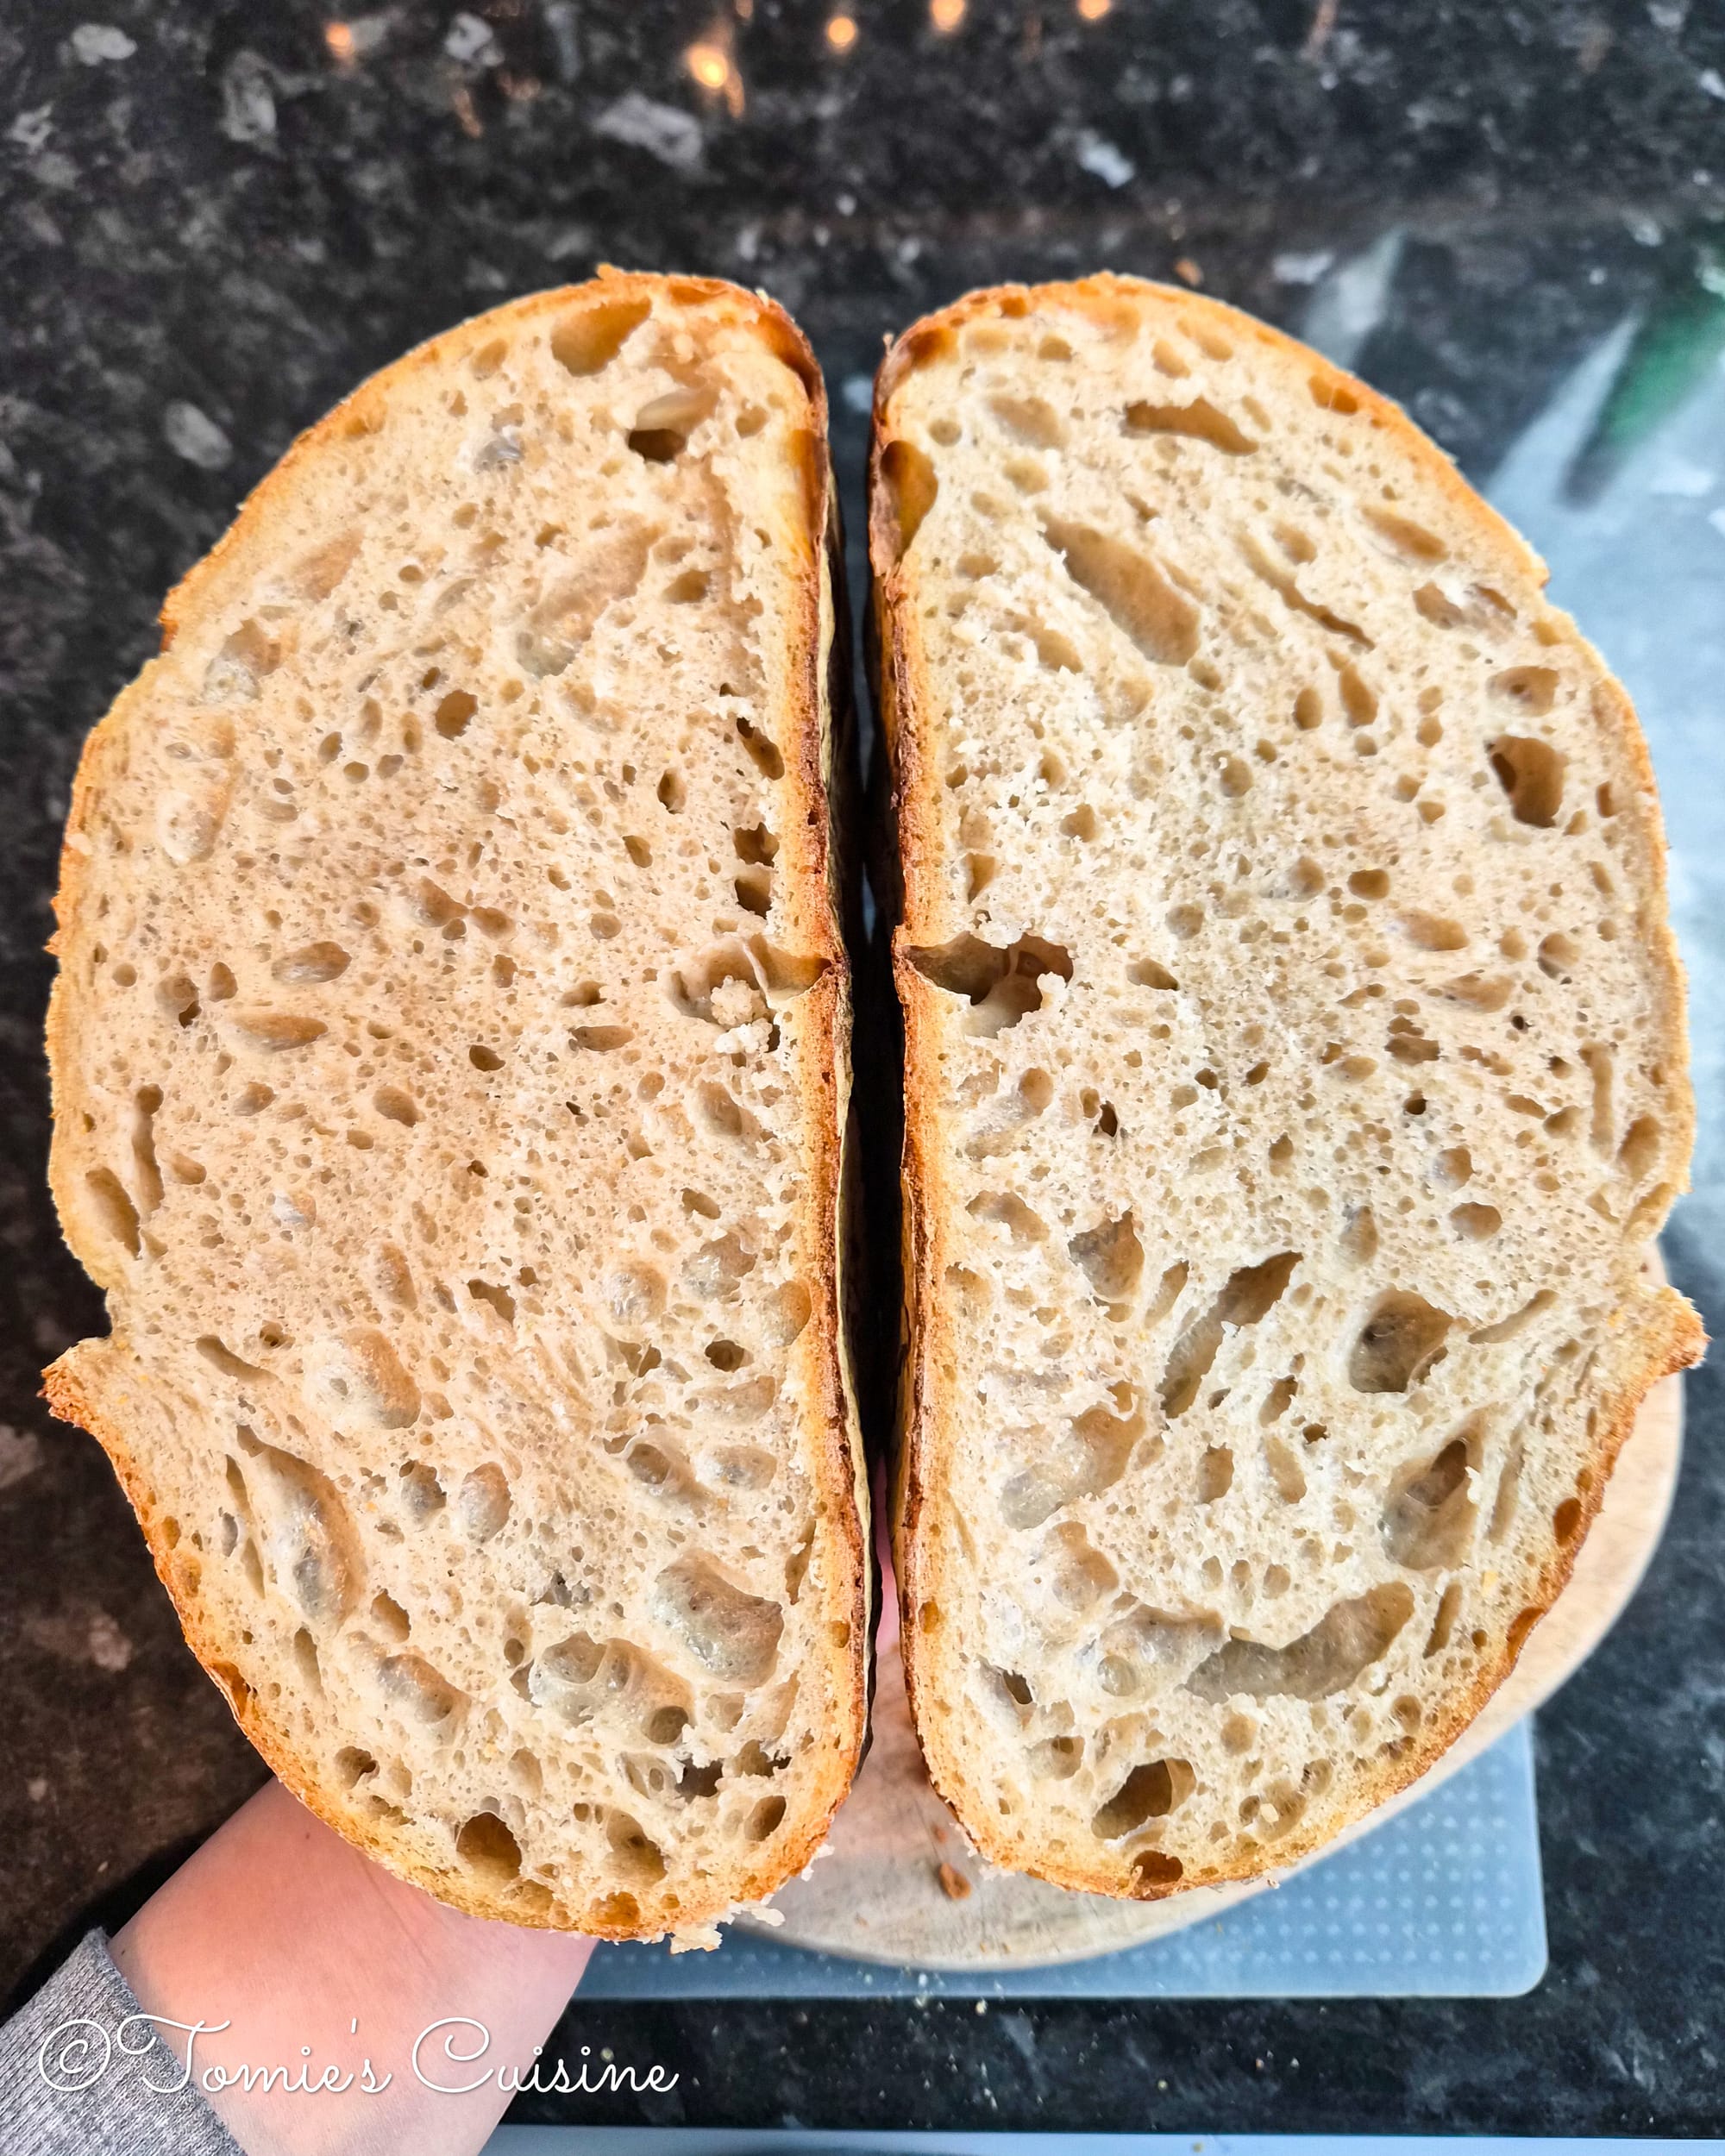
- Take the bread out and leave it to cool on a wire rack. I'd strongly recommend not cutting into it while it's still hot, as the texture will be gummy.
- Once cooled, slice it open and enjoy admiring your work! And of course, tasting it.
Closing thoughts
And there you have it, my sourdough recipe and everything I have learned so far! I hope this guide gives you a solid starting point for finding your own rhythm with sourdough baking. For our next sourdough article, we are planning to compare different methods, such as:
- Preheated Dutch oven vs non-preheated Dutch oven
- Autolyse vs no autolyse
- Dutch oven vs open bake
- And more!
We are already testing some of these methods, and it is genuinely exciting to see the differences. If you have come across or tried a sourdough technique, do let us know; we would love to try it too!
Never miss a new post
Subscribe to Tomie’s Cuisine newsletter and get:
- New articles in the sourdough series as soon as they go live
- Seasonal recipes with step-by-step photos
- Eco-friendly kitchen guides and honest product reviews
- Behind-the-scenes from our Nakasendo hiking series in Japan
No spam, ever.
We are on Instagram, Pinterest, and Facebook. Don't forget to subscribe to our newsletter so you never miss a new post!